Meta Description: Discover the ultimate guide to stunning DIY wall decor! From beginner-friendly crafts to advanced statement pieces, learn how to create personalized, budget-friendly home art. Start your project today!
Introduction: Why Your Walls Are Your Greatest Canvas
Look around you. What do you see? For many of us, our walls are vast, blank canvases waiting to tell a story. They are the backdrop to our lives, yet they are often the most neglected part of our homes. Hiring an interior designer or purchasing expensive art isn’t always feasible. This is where the magic of DIY Wall Decor comes in. It’s more than just a trend; it’s a movement towards creating personalized, meaningful, and affordable spaces that truly reflect who you are.
Engaging in DIY Wall Decor projects allows you to infuse your personality into your home, turn memories into art, and experience the immense satisfaction of building something beautiful with your own hands. Whether you’re a seasoned crafter or a complete novice, this comprehensive guide will walk you through every step of transforming your blank walls into a breathtaking Cozy Nest. We will explore over 50 ideas, delve into essential techniques, and answer all your burning questions, empowering you to become the artist of your own home.
The Ultimate Benefits of Choosing DIY Wall Decor
Before we dive into the “how,” let’s solidify the “why.” Embracing DIY Wall Decor offers a multitude of advantages that go far beyond simple aesthetics.
- Unmatched Personalization: Your home should be a reflection of you. With DIY projects, you control the color, size, texture, and theme. You can incorporate family photos, travel souvenirs, or colors that spark joy in a way that store-bought art never could.
- Significant Cost Savings: High-quality, large-scale art can cost hundreds or even thousands of dollars. DIY Wall Decor leverages affordable materials like wood, fabric, paper, and even upcycled items, allowing you to create a high-end look for a fraction of the cost.
- A Deep Sense of Accomplishment: There is a unique and powerful pride that comes from looking at a finished piece on your wall and saying, “I made that.” This creative process is a fantastic stress-reliever and a huge boost to your confidence.
- Eco-Friendly and Sustainable Choices: The “DIY” mindset often goes hand-in-hand with “upcycling.” You can breathe new life into old windows, pallet wood, discarded bottles, or leftover fabric, reducing waste and creating a one-of-a-kind piece with a story.
- Perfect Fit for Any Space: Have an awkwardly shaped nook or a gigantic, intimidating wall? DIY Wall Decor can be custom-sized to fit any space perfectly, solving design dilemmas that off-the-shelf items can’t.
Getting Started: Your DIY Wall Decor Toolkit & Essentials
Every great project starts with the right tools. You don’t need a professional workshop, but a well-stocked basics kit will make your DIY Wall Decor journey smooth and enjoyable.
Essential Tools for Every Project
- Measuring & Leveling: A tape measure, a ruler, and a spirit level are non-negotiable for ensuring your creations hang straight and true.
- Adhesives: A variety is key.
- Command Strips: Perfect for renters and lightweight items; they don’t damage walls.
- Strong Glue (E6000 or a hot glue gun): For bonding materials like wood, fabric, and ceramics.
- Mod Podge: The quintessential decoupage medium for sealing and adhering paper.
- Liquid Nails/Heavy-Duty Wall Adhesive: For mounting heavier objects like large mirrors or wooden panels.
- Cutting Tools:
- Scissors: A good, sharp pair of fabric and paper scissors.
- Craft Knife (X-Acto) and Cutting Mat: For precise paper and mat board cuts.
- Hand Saw or Jigsaw: For basic woodworking projects.
- Painting Supplies:
- Paint Brushes: In various sizes and shapes (flat, angled, round).
- Painter’s Tape: For creating clean lines and geometric patterns.
- Sample Pots of Paint: An inexpensive way to get a variety of colors.
- Primer & Sealer (e.g., Mod Podge or Polyurethane): To prepare surfaces and protect your finished work.
Must-Have Materials to Stockpile
Start collecting these items, and you’ll always be ready for a spontaneous project:
- Wood: Pallet wood, pre-cut canvases, wooden dowels, and slices.
- Fabric & Yarn: For macrame, fabric wall hangings, and tapestry.
- Paper: Cardstock, scrapbook paper, old books, maps, and wallpaper samples.
- Frames: Thrift stores are a goldmine for inexpensive frames that can be spray-painted.
- Natural Elements: Driftwood, pressed flowers, interesting branches, and seashells.
Section 1: Beginner-Friendly DIY Wall Decor Ideas
New to the world of DIY? These projects are low-cost, low-skill, and deliver maximum visual impact.
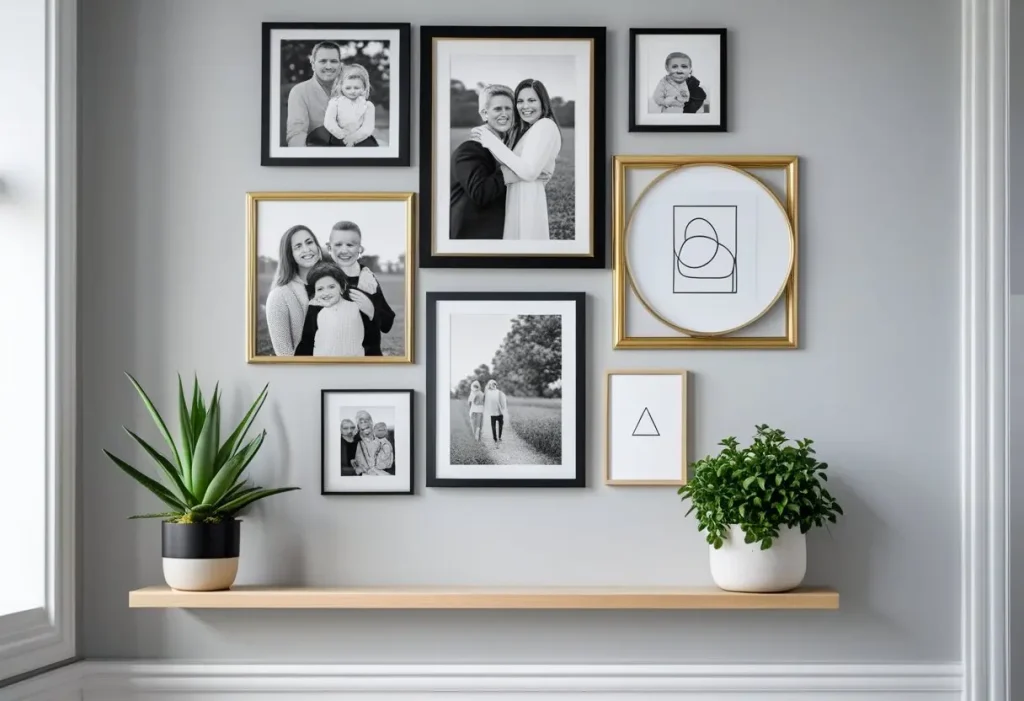
1. The Gallery Wall: A Curated Collection of Memories
A gallery wall is the quintessential DIY Wall Decor project. It’s a dynamic way to display a collection of art, photographs, and objects.
- How to Create It:
- Choose a Theme: Decide on a cohesive theme, such as family photos in black and white, botanical prints, or a mix of mirrors and objects.
- Gather Your Elements: Collect frames (mix and match styles for an eclectic look, or use identical frames for a modern feel), small shelves, and other items.
- Plan the Layout: Trace your frames onto craft paper or newspaper, cut them out, and tape them to the wall. Play with the arrangement until you find a composition you love. This prevents putting unnecessary holes in your wall.
- Hang with Precision: Start with the central piece and work outwards. Use a level to ensure everything is straight.
- Pro Tip: Maintain a consistent spacing (2-3 inches) between each frame for a polished look.
2. Washi Tape Wall Art: Geometric & Temporary
Perfect for renters or anyone who loves to change their decor frequently, washi tape is a game-changer for DIY Wall Decor.
- How to Create It:
- Select Your Design: Simple geometric shapes like triangles, hexagons, or straight-line patterns work best.
- Prep the Wall: Ensure the wall is clean and dry.
- Map it Out: Use a pencil and ruler to lightly mark guide points if needed.
- Apply the Tape: Gently unroll the tape, pressing it firmly against the wall as you go. For sharp corners, tear the tape instead of cutting it for a cleaner look.
- Pro Tip: Create a large, abstract mountain range behind your bed or a simple border around a door frame.
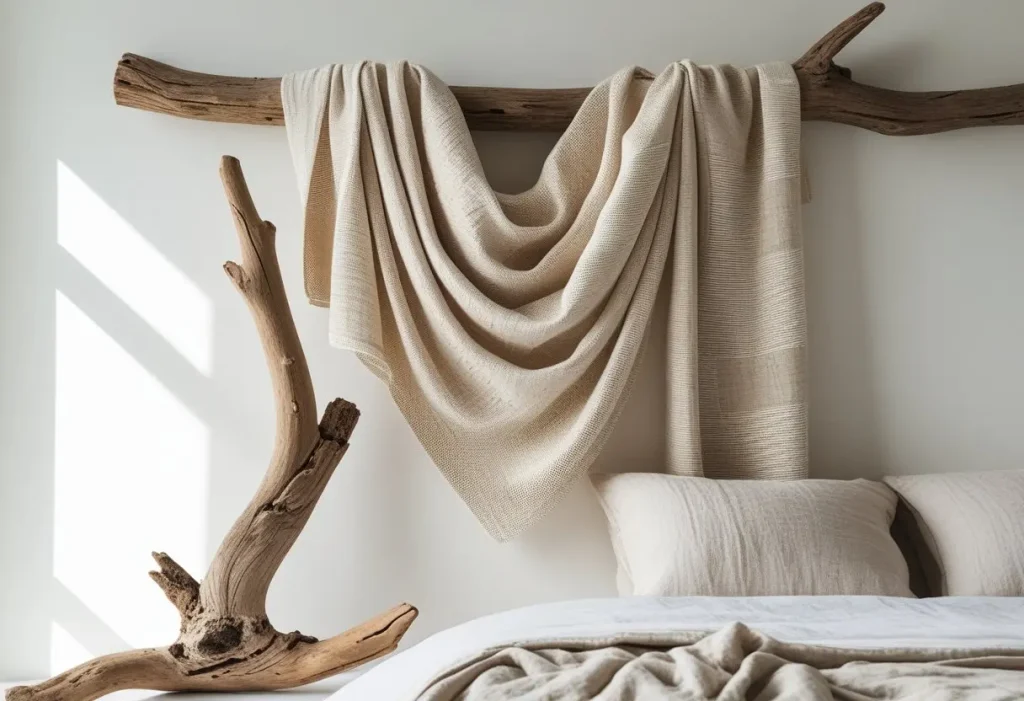
3. Fabric Wall Hangings: Texture and Color
Add softness and texture to your room with a simple fabric hanging.
- How to Create It:
- Find a Dowel & Fabric: A wooden dowel, a fallen branch, or even a copper pipe can serve as the top rod. Choose a fabric you love—a scarf, a vintage textile, or a remnant from a fabric store.
- Attach the Fabric: Drape the fabric over the dowel. You can secure it with glue, stitches, or simply let it hang.
- Add Embellishments: Tie on tassels, pom-poms, or feathers for extra bohemian flair.
Section 2: Intermediate DIY Wall Decor Projects
Ready to level up? These projects involve a few more tools and steps but are incredibly rewarding.
1. Wood Slice Art: Bringing Nature Indoors
Wood slices have a warm, organic feel that instantly makes a space feel cozier.
- How to Create It:
- Source Your Slices: You can buy pre-sliced and sanded bags online or from craft stores, or make your own from fallen branches (ensure they are dry).
- Plan Your Design: Arrange the slices on the floor first. You can create a strict grid, a random pattern, or a specific shape like a heart or tree.
- Attach to a Backer: For stability, attach the slices to a large piece of plywood or canvas using strong wood glue.
- Finish It: Apply a coat of polyurethane or clear wax to seal the wood and enhance its natural grain.
- Pro Tip: Paint a simple geometric pattern or a quote on the slices before sealing them for a personalized touch.
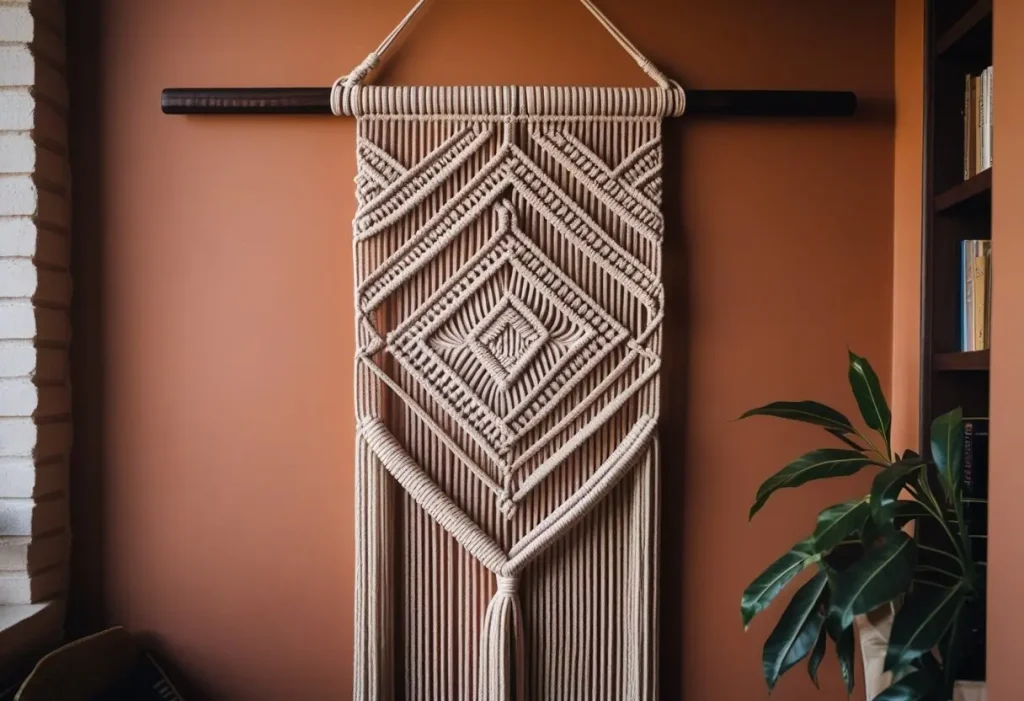
2. Modern Macrame: The Boho-Chic Knot
Macrame has made a huge comeback and is a fantastic way to create stunning textural DIY Wall Decor.
- How to Create It:
- Learn the Basic Knots: Start with the Lark’s Head Knot (for attaching cord to the dowel), the Square Knot, and the Half-Hitch. Countless tutorials are available on YouTube.
- Choose Your Cord: 3mm or 4mm single-strand cotton rope is perfect for beginners.
- Start with a Simple Pattern: A basic wall hanging with a simple diamond pattern created by square knots is a great first project.
- Add Beads or Dyed Sections: Incorporate wooden beads or dip-dye the ends of your cord for a pop of color.
3. Framed Pressed Flowers & Botanicals
Capture the delicate beauty of nature in a timeless display.
- How to Create It:
- Press Your Flowers: Place flowers and leaves between the pages of a heavy book for 2-4 weeks. Alternatively, use a flower press.
- Choose a Frame: A deep shadow box frame works best to give the flowers room.
- Arrange Your Composition: On a background of cardstock or fabric, carefully arrange your pressed botanicals using tweezers. Use a tiny dot of glue to secure them.
- Seal and Frame: Carefully place the glass back on to protect your delicate artwork.
Section 3: Advanced & Statement-Making DIY Wall Decor
For those with some DIY experience and a desire to create a true centerpiece for a room.
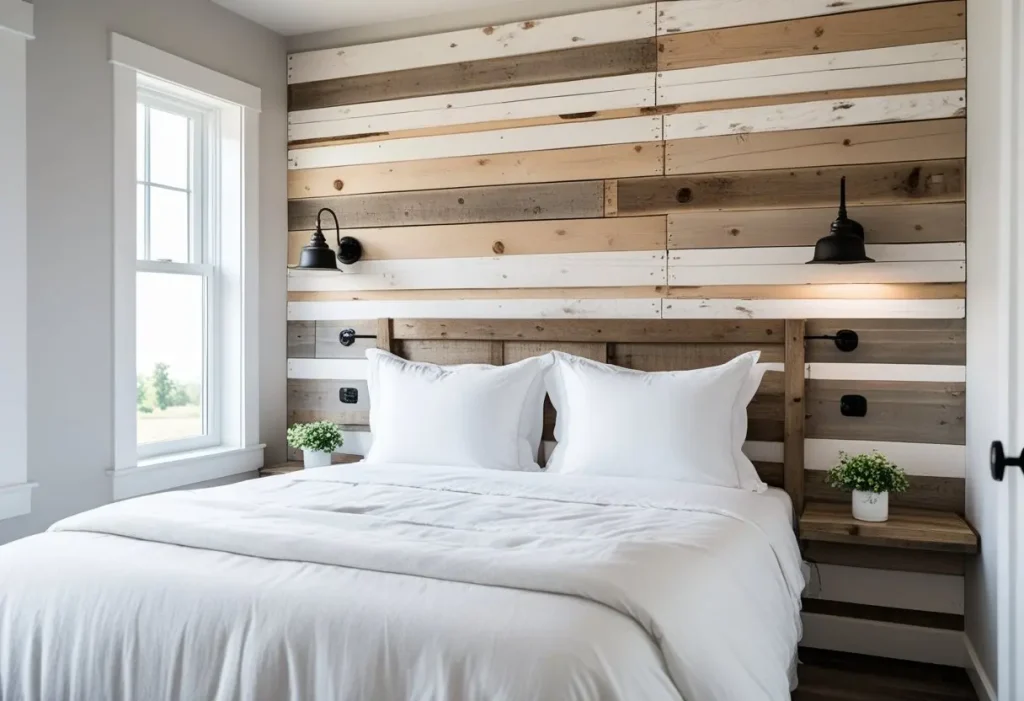
1. Wood Pallet Feature Wall
A reclaimed wood accent wall adds incredible texture, warmth, and character. This is a more labor-intensive but highly impactful project.
- How to Create It:
- Source and Prep Pallets: Find clean, heat-treated (HT) pallets. Dismantle them carefully using a pry bar and hammer. Sand each slat thoroughly to remove splinters.
- Plan the Layout: Decide on a pattern—horizontal, vertical, herringbone, or a random mix.
- Treat the Wood: You can whitewash, stain, or paint the wood slats, or leave them natural.
- Install: You can attach the slats directly to the wall studs using a nail gun or construction adhesive. Start from the bottom and work your way up.
- Safety First: Always wear safety glasses and gloves when breaking down pallets.
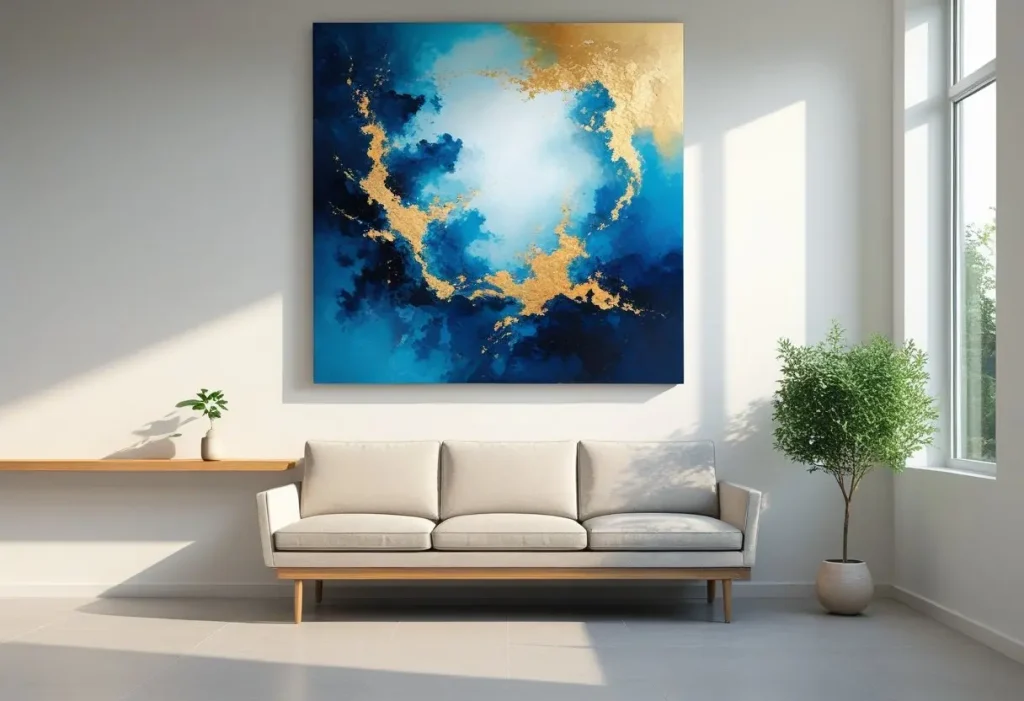
2. Large-Scale Abstract Canvas Art
Create a massive, professional-looking painting for your living room without the professional price tag.
- How to Create It:
- Gather Materials: A large, pre-stretched canvas, acrylic paints, a variety of brushes and/or a palette knife.
- Choose a Color Palette: Select 3-5 colors that complement your room’s decor.
- Create Your Background: Paint the entire canvas in your base color.
- Build Layers and Texture: Don’t overthink it! Use a palette knife to add thick layers of paint, creating texture. Drag a comb or a piece of cardboard through the paint. Splatter, drip, and layer colors. Let each layer dry slightly before adding the next.
- Step Back: Frequently step back from your work to assess the composition.
- Pro Tip: Look up “abstract acrylic painting techniques” on YouTube for inspiration and guidance.
3. Custom Floating Shelves with Integrated Planters
Combine function and aesthetics with this modern woodworking project.
- How to Create It:
- Cut the Wood: You’ll need wood for the shelf itself and a front-facing box that acts as the planter.
- Assemble the Planter: Construct a long, narrow box from the wood, ensuring one side is open. Seal the inside with a waterproof sealant.
- Attach the Shelf: Fix the shelf board to the top of the planter box.
- Install Hidden Brackets: Use hidden floating shelf brackets to mount the entire unit to the wall, giving it a clean, “floating” look.
- Add Plants: Place a narrow plastic liner inside the planter box and add soil and drought-tolerant succulents or trailing plants.
Section 4: Room-by-Room DIY Wall Decor Guide
Different rooms have different vibes and functional needs. Here’s how to tailor your DIY Wall Decor projects.
Living Room: The Focal Point
The living room is where you entertain and relax. Your DIY Wall Decor should make a statement.
- Ideas: A large abstract canvas, a gallery wall above the sofa, a macrame tapestry, or a series of floating shelves with books and objects.
- Pro Tip: Scale is key. A small piece on a large wall will look lost. Don’t be afraid to go big!
Bedroom: A Serene Sanctuary
The bedroom should be a calm and personal retreat.
- Ideas: A delicate pressed flower arrangement above the bed, a fabric hanging on the headboard wall, a calming landscape painting, or a word art piece with an inspiring quote.
- Pro Tip: Stick to a softer, more muted color palette to promote relaxation.
Home Office: Boost Productivity & Creativity
Your workspace should inspire you and keep you focused.
- Ideas: A large pegboard organizer painted in a fun color, an inspirational vision board, a large world map, or a grid of small, motivational prints.
- Pro Tip: Functional decor is your best friend here. Use shelves and organizers to keep supplies handy and your desk clear.
Kitchen & Dining Area: Warm and Welcoming
Add personality to the heart of your home.
- Ideas: Open shelving to display beautiful dishes, a wall of hanging copper mugs or pans, a collection of vintage plates, or a simple herb garden wall made from mounted mason jars.
- Pro Tip: Ensure materials in the kitchen can be easily wiped clean, as they may be exposed to grease and moisture.
Section 5: Mastering the Techniques & Finishing Touches
A great project is made perfect with the right techniques.
A Guide to Hanging & Arranging
- The Golden Rule of Height: The center of your artwork should be at approximately 57-60 inches from the floor. This is the average human eye level.
- Grouping Artwork: Treat multiple pieces as one single unit. The entire grouping should relate to the furniture below it (e.g., a gallery wall above a sofa should be no wider than the sofa itself).
- Using the Right Hardware:
- Picture Hooks: The best choice for most framed art. They are angled to hold weight securely.
- Drywall Anchors: Essential for hanging heavy items on drywall. They expand behind the wall to distribute the weight.
- Finding a Stud: Use a stud finder to locate the wooden framing behind your drywall. Hanging directly into a stud provides the strongest hold.
Choosing the Perfect Color Palette
Your DIY Wall Decor should harmonize with your room.
- Monochromatic: Uses different tints, tones, and shades of a single color. Very sophisticated and calm.
- Analogous: Uses colors that are next to each other on the color wheel (e.g., blue, blue-green, green). Creates a serene and comfortable design.
- Complementary: Uses colors opposite each other on the color wheel (e.g., blue and orange). Creates a high-impact, dynamic look.
For more inspiration on color theory, check out this excellent guide from [external authority link, e.g., Sherwin-Williams].
FAQs: Your DIY Wall Decor Questions Answered
Here are answers to the most common “People Also Ask” questions from Google.
Q1: What are some cheap DIY Wall Decor ideas?
A: Some of the most affordable ideas include washi tape art, creating a gallery wall with thrifted frames, framing beautiful fabric scraps or wallpaper samples, and making art from found objects like driftwood or interestingly shaped branches.
Q2: How can I make my DIY Wall Decor look professional?
A: The key is in the finishing touches. Use a level for hanging, invest in quality paint brushes for clean lines, sand wood edges smoothly, and use a sealant to give your work a finished, professional sheen. Good photography for your gallery wall also makes a huge difference.
Q3: What is the easiest thing to make for wall decor?
A: Framing a beautiful piece of textile, a map, or a page from a vintage book is arguably the easiest. It requires minimal skill—just finding an object you love and putting it in a frame.
Q4: How do I start a DIY Wall Decor project?
A: Start by identifying your style (Pinterest is great for this!). Then, assess your skill level and budget. Choose a project from this guide that matches both. Gather all your materials before you begin, and don’t be afraid to make mistakes—that’s part of the creative process!
Q5: How can I decorate a large, blank wall on a budget?
A: A large wall doesn’t require one expensive piece. Create a large-scale grid of identical, inexpensive frames. Make an oversized piece from a cheap material like MDF and paint an abstract design. Or, create a “wall of memories” with a mix of shelves and art.
Conclusion: Your Home, Your Masterpiece
Your journey into the world of DIY Wall Decor is more than just a series of projects; it’s a path to creating a home that is authentically and uniquely yours. It’s about the joy of the process, the pride of the result, and the daily comfort of being surrounded by pieces that hold meaning. We’ve explored over 50 ideas, from simple tape designs to advanced woodworking, proving that there is a perfect project for every skill level and style. Don’t let those blank walls intimidate you any longer. Embrace the creative challenge, gather your tools, and start building the Cozy Nest you’ve always dreamed of.
Call to Action (CTA)
Feeling inspired but want more? Explore our website, CozyNestDecor.pro, for more detailed tutorials, curated material lists, and a community of fellow DIY enthusiasts. Share your creations with us using the hashtag #MyCozyNestDIY – we can’t wait to see what you make! For your next project, dive into our guides on [Internal Link: Boho Bedroom Decor] or [Internal Link: Easy Upcycling Projects] to continue your home transformation.