Your kitchen floor is the stage upon which the daily drama of life unfolds. It witnesses the hurried breakfasts, the leisurely Sunday coffees, the dropped spoons, and the occasional spilled glass of red wine. It’s a workhorse, bearing the weight of cabinets, appliances, and countless footsteps. Yet, it’s also a foundational design element that sets the tone for the entire room. Choosing the right kitchen floor tile is a decision that blends practicality with aesthetics, a significant investment in both your home’s function and its soul.
Table of Contents
- Introduction: More Than Just a Surface
- The Foundation: Understanding Tile Properties
- Porcelain vs. Ceramic: The Great Debate
- The PEI Rating System: Decoding Durability
- Water Absorption and Why It Matters
- The Slip Resistance Factor (COF)
- A World of Choice: Exploring Kitchen Floor Tile Materials
- Porcelain Tile: The Undisputed Champion
- Ceramic Tile: The Classic Contender
- Natural Stone Tile: Timeless Beauty and Character
- Marble: Luxurious Drama
- Granite: Unmatched Hardness
- Slate: Textured and Non-Slip
- Travertine: Old-World Charm
- Limestone: Subtle Sophistication
- Cement Tiles: Bold Patterns and Artisanal Flair
- Terrazzo: The Retro Comeback Kid
- Quarry Tile: The Utilitarian Workhorse
- The Style Spectrum: Colors, Patterns, Sizes, and Finishes
- Color Psychology for Your Kitchen Floor
- The Magic of Grout: A Design Powerhouse
- Tile Size and Layout: How to Manipulate Space
- Surface Finishes: From Matte to High-Gloss
- The Trend Report: What’s Hot in Kitchen Floors
- The Professional Installation Deep Dive
- Subfloor Preparation: The Unseen Hero
- Waterproofing: Your Kitchen’s Insurance Policy
- Mortar and Adhesives: Choosing the Right Glue
- Layout and Cutting: The Art of Precision
- Grouting for a Flawless Finish
- Sealing and Protecting Your Investment
- Living With Your Choice: Maintenance and Care
- Daily, Weekly, and Monthly Cleaning Routines
- Dealing with Stains and Spills
- Grout Maintenance: Keeping it Clean and Bright
- Long-Term Care and When to Re-seal
- Cost Analysis: Budgeting for Your Kitchen Floor Tile Project
- Material Cost Breakdown
- Installation Labor Costs
- Hidden Costs to Anticipate
- Return on Investment (ROI)
- DIY vs. Hiring a Pro: A Frank Assessment
- Conclusion: Stepping Forward with Confidence
- Frequently Asked Questions (FAQs)
The options can feel paralyzing. Walk into any tile showroom or browse online, and you’re met with a dizzying array of materials, colors, sizes, and textures. How do you navigate this sea of choice? How can you be sure that the beautiful tile you fell in love with will stand up to the realities of your busy household?
This guide is designed to be your compass. We will move beyond the surface-level brochures and dive deep into the technical details, the lived-in experience, and the design principles that separate a good floor from a great one. We will equip you with the knowledge to speak confidently with designers and contractors, to understand the long-term implications of your choice, and to select a kitchen floor tile that you will love for years to come. This isn’t just about picking a tile; it’s about crafting a foundation for your home.
The Foundation: Understanding Tile Properties
Before we fall in love with a specific color or pattern, we must become fluent in the language of tile. Understanding these core properties will empower you to make an informed decision that balances beauty with brawn.
Porcelain vs. Ceramic: The Great Debate
This is the most common starting point, and for good reason. While all porcelain is ceramic, not all ceramic is porcelain. The difference lies in the composition and manufacturing process.
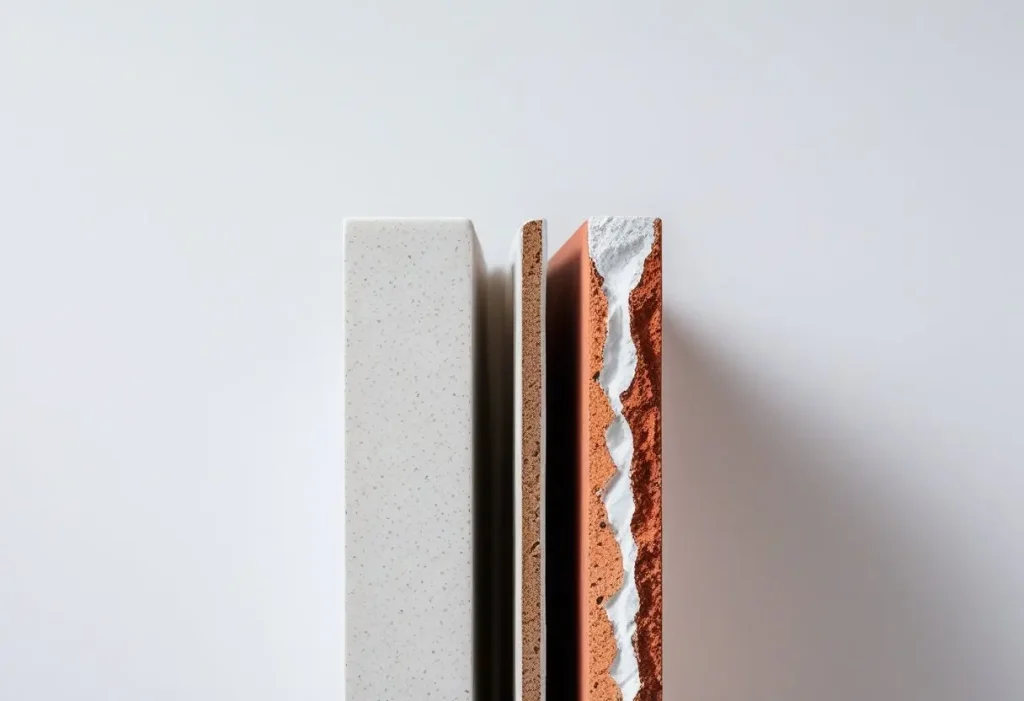
Ceramic tiles are made from a mixture of natural clay, water, and solvents. They are fired at a high temperature, but generally at a lower heat and for a shorter time than porcelain. This results in a softer, more porous tile. They are easier to cut and work with, making them a favorite for DIYers tackling walls or low-traffic floors. However, for a kitchen floor tile, their higher porosity can be a liability against spills and stains.
Porcelain tiles are crafted from a more refined clay mixture and are pressed under higher pressure. They are fired at extreme temperatures, which vitrifies the tile, making it incredibly dense and non-porous. Think of it like glass versus a sponge. This density gives porcelain its legendary durability, low water absorption, and resistance to cracking and chipping. It’s the reason porcelain is almost always the recommended choice for a high-traffic kitchen floor tile.
The Verdict: For kitchens, porcelain is typically the superior choice due to its durability and water resistance. Ceramic can work in a low-traffic kitchen or as a decorative accent, but for the main floor area, porcelain’s resilience is unmatched.
The PEI Rating System: Decoding Durability
How can you tell if a tile is tough enough for your kitchen? Look for its PEI (Porcelain Enamel Institute) Rating. This scale, from I to V, measures the resistance of the tile’s glazed surface to abrasion and wear.
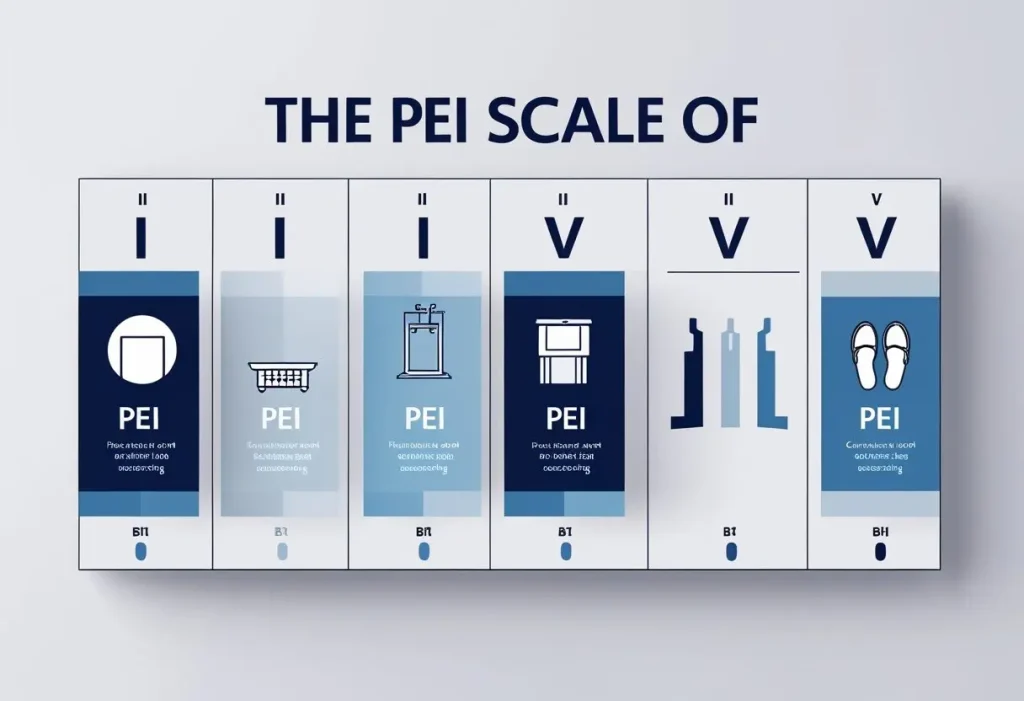
- PEI I (Light Traffic): For walls only. Not suitable for floors.
- PEI II (Medium Traffic): Suitable for bathroom floors and walls where soft-soled footwear is used. Generally not recommended for most kitchens.
- PEI III (Moderate Traffic): Can handle most residential kitchen traffic. A good choice for average family use.
- PEI IV (Heavy Traffic): The sweet spot for a busy kitchen floor tile. It can withstand the comings and goings of a active family, pets, and frequent entertaining.
- PEI V (Extra Heavy Traffic): For commercial or institutional use (e.g., shopping malls, airports). Overkill for a home kitchen, but you’ll never have to worry about wear!
When selecting your kitchen floor tile, aim for a PEI rating of III, and ideally IV, for long-term satisfaction.
Water Absorption and Why It Matters
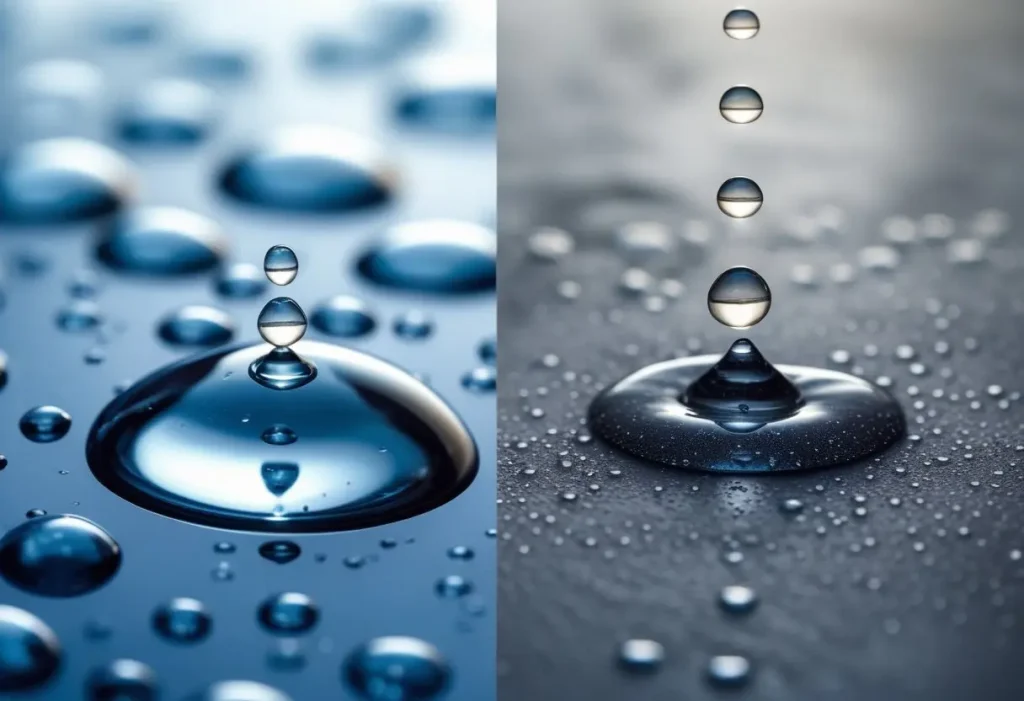
Measured by the ASTM C373 test, water absorption is a critical metric, especially in a room prone to spills.
- Impervious (< 0.5% absorption): The gold standard for kitchen floor tile. Porcelain tiles typically fall here. They absorb virtually no water, making them stain-resistant, frost-proof (for outdoor use), and hygienic.
- Vitreous (0.5% to 3% absorption): A good rating. Many ceramic tiles fall into this category. They are suitable for indoor floors but may require sealing if used in a kitchen with a high spill risk.
- Semi-Vitreous (3% to 7% absorption) & Non-Vitreous (>7% absorption): Not recommended for kitchen floors. These tiles are too porous and will readily absorb spills, leading to stains and potential bacterial growth.
The Slip Resistance Factor (COF)
Safety is paramount. The Coefficient of Friction (COF) measures how slippery a tile is when wet—a common occurrence in kitchens. A higher COF means more grip.
- Static COF (SCOF): This is the measurement to look for. The Americans with Disabilities Act (ADA) recommends a minimum SCOF of 0.6 for level surfaces, but for a kitchen, aiming for 0.6 or higher is wise.
- How to Find It: A textured, matte, or honed finish will have a higher SCOF than a high-gloss, polished one. When browsing, ask for the tile’s SCOF rating. Don’t just rely on feel in the showroom; a dry, polished tile can feel safe, but it becomes a hazard when wet. For a truly safe kitchen floor tile, prioritize texture.
A World of Choice: Exploring Kitchen Floor Tile Materials
Now that we understand the technical specs, let’s explore the vast and beautiful world of materials. Each offers a unique blend of aesthetics, performance, and price.
Porcelain Tile: The Undisputed Champion
As discussed, porcelain is the go-to for a reason. Its technological advancements have been staggering, allowing it to mimic almost any other material with breathtaking accuracy.
- Pros:
- Extreme Durability: Resistant to scratches, chips, and cracks.
- Stain and Waterproof: Impervious to wine, oil, juice, and more.
- Low Maintenance: Easy to clean and doesn’t require sealing (unless it’s a through-body unglazed porcelain).
- Incredible Versatility: Available in designs that look like wood plank, natural stone, concrete, and even fabric.
- Cons:
- Hard and Cold: Can be hard underfoot and cold in winter (though this can be mitigated with radiant heating).
- Difficult to Install: Requires specialized wet saws and tools, making professional installation highly recommended.
- Cost: Generally more expensive than ceramic, though prices have become more competitive.
Best For: Busy households, families with kids and pets, anyone wanting a low-maintenance, high-durability floor that offers maximum design flexibility.
Ceramic Tile: The Classic Contender
Ceramic tile brings a classic, often more affordable, option to the table. Its vibrant glazes and artisanal feel have enduring appeal.
- Pros:
- Cost-Effective: Typically less expensive than porcelain.
- Easier to Work With: Softer material is easier to cut, making it more DIY-friendly.
- Vast Design Options: Endless colors, patterns, and handmade styles.
- Cons:
- Less Durable: More prone to chipping and wear over time in high-traffic areas.
- More Porous: Requires sealing to protect against stains in a kitchen environment.
- Can Feel Less Premium: The manufacturing process can sometimes result in a less “substantial” feel compared to porcelain.
Best For: Budget-conscious projects, low-to-medium traffic kitchens, DIY enthusiasts, and those seeking specific decorative patterns that are more common in ceramic.
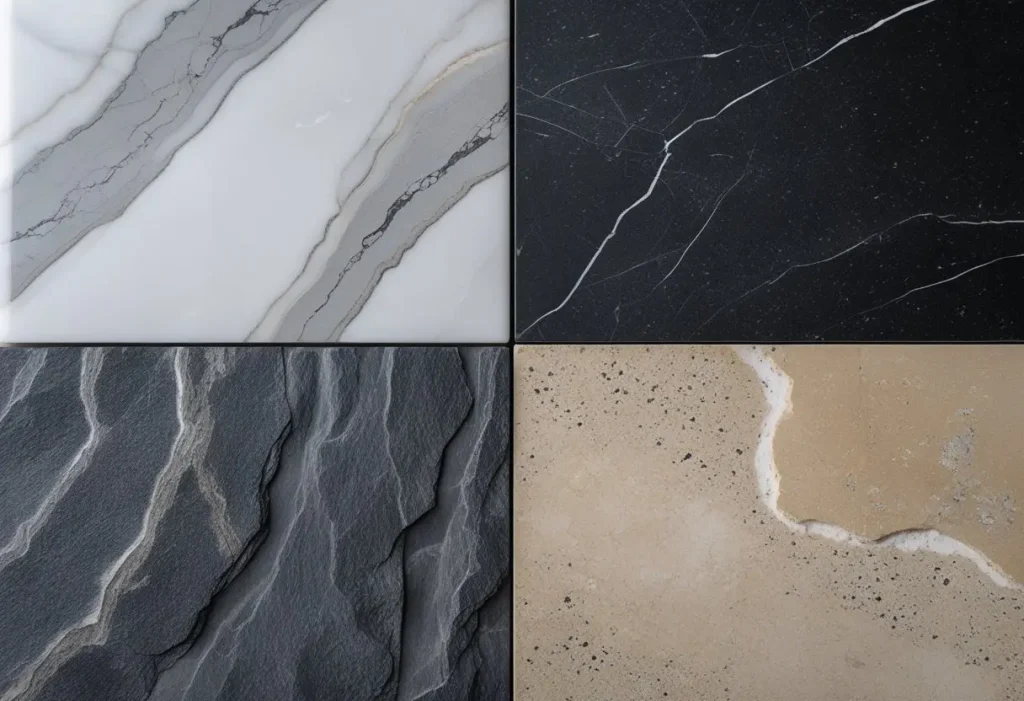
Natural Stone Tile: Timeless Beauty and Character
Nothing replicates the unique, organic beauty of natural stone. Each tile is a one-of-a-kind piece of the earth, offering depth and variation that man-made products strive to achieve. However, this beauty comes with a need for commitment and care.
A Critical Note: All natural stone is porous and must be sealed upon installation and re-sealed periodically (typically annually) to prevent staining and etching.
Marble: Luxurious Drama
Marble is the epitome of luxury. Its elegant veining and soft luster have graced palaces for centuries.
- Pros: Unmatched beauty and unique veining; naturally cool, perfect for baking areas.
- Cons: Very soft and porous. Prone to scratching and etching (dull marks from acids like lemon juice or vinegar). Requires a high level of maintenance and a homeowner comfortable with it developing a “patina.”
- Best For: Low-traffic, formal kitchens where aesthetics are the top priority and the homeowner is diligent about maintenance.
Granite: Unmatched Hardness
Before quartz countertops dominated, granite was the king of durability. As a floor tile, it brings that same toughness.
- Pros: Extremely hard and resistant to scratches; heat resistant; unique speckled patterns.
- Cons: The natural pitting and fissures can trap dirt; requires sealing; can be cold and hard underfoot; patterns can be busy for some tastes.
- Best For: Homeowners seeking the durability of stone with a more robust profile than marble.
Slate: Textured and Non-Slip
Slate offers a rustic, textured elegance. Its cleft surface and rich, earthy colors make it a popular choice for creating a cozy, organic feel.
- Pros: Naturally high slip-resistance due to its texture; very durable; stunning dimensional look.
- Cons: The textured surface can be difficult to clean; the “cleft” can be uneven, which some find challenging underfoot; quality can vary, with some softer slate being prone to flaking.
- Best For: Rustic, traditional, or modern farmhouse kitchens where slip-resistance and natural texture are desired.
Travertine: Old-World Charm
A form of limestone, travertine is characterized by its pitted surface and beautiful, earthy tones. It evokes the feeling of ancient Roman villas.
- Pros: Warm, classic appearance; available in filled (smooth) or unfilled (textured) finishes.
- Cons: Very soft and porous. The surface holes can collect dirt and grime; requires frequent sealing; susceptible to scratching and acids.
- Best For: Mediterranean or Old-World style kitchens where achieving an aged, authentic look is the goal.
Limestone: Subtle Sophistication
Limestone offers a more uniform and subtle look than travertine, with a soft, palette of beiges, grays, and taupes.
- Pros: Sophisticated, muted aesthetic; provides a calm, neutral backdrop.
- Cons: Softer than granite or slate; porous and requires sealing; can be scratched fairly easily.
- Best For: Homeowners seeking a quiet, elegant, and uniform natural stone look.
Cement Tiles: Bold Patterns and Artisanal Flair
Also known as encaustic tiles, cement tiles are made from pigmented cement, sand, and marble dust pressed into molds. They are not glazed, so their color and pattern go all the way through.
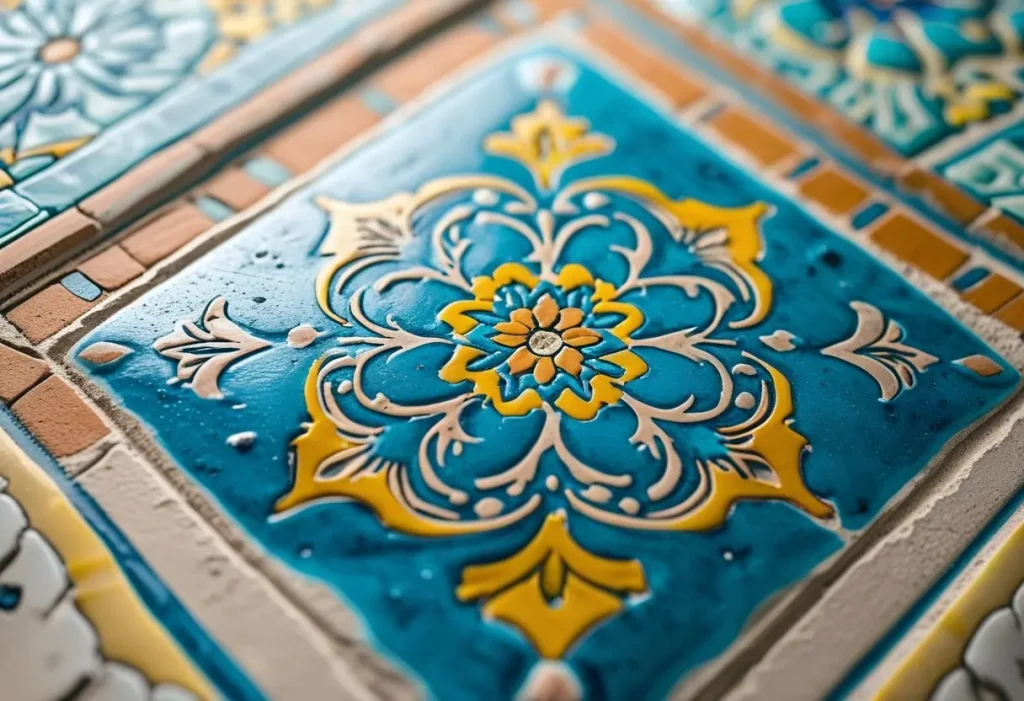
- Pros: Unbelievable, bold, and custom patterns; each tile is a work of art; the color runs through, so pattern won’t wear off.
- Cons: Extremely porous and soft. Must be sealed meticulously before and after installation and requires frequent re-sealing; the surface can be prone to scratching and staining if not perfectly maintained; the handmade nature means size and color can have slight variations.
- Best For: Statement-making spaces where the homeowner is passionate about a specific pattern and is committed to a rigorous maintenance routine.
Terrazzo: The Retro Comeback Kid
Terrazzo, a composite of chips of marble, quartz, or glass set in a cement or epoxy binder, is having a major moment. It’s poured in place or available as tiles.
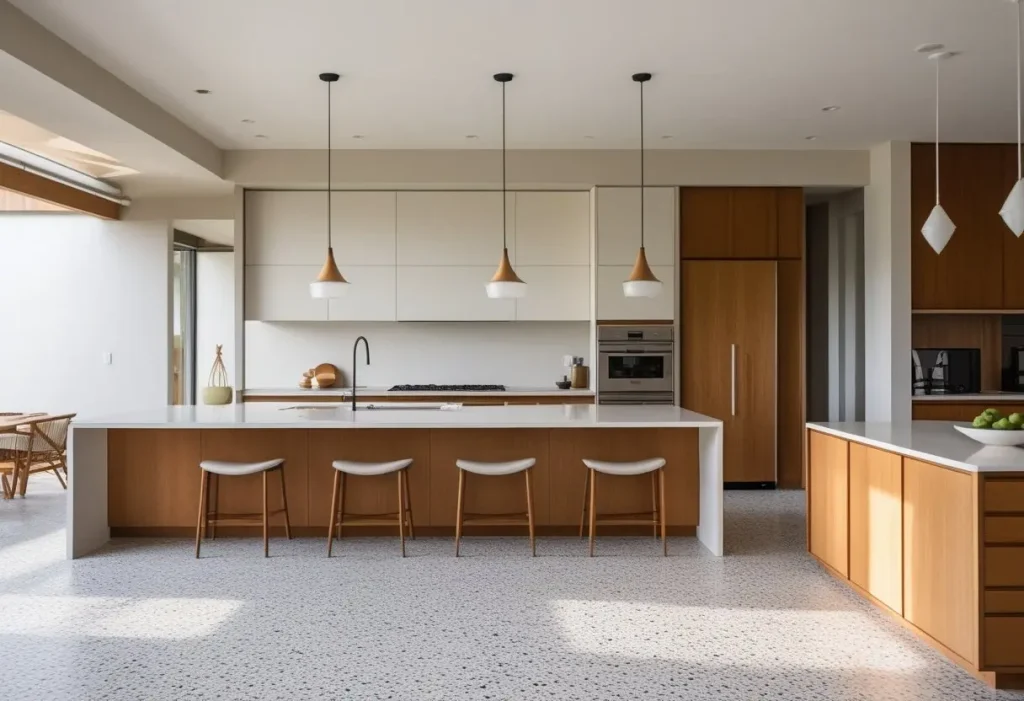
- Pros: Seamless look (if poured); incredibly durable and long-lasting; unique, speckled appearance; easy to clean once sealed.
- Cons: Expensive; the installation is highly specialized; the cement-based version requires sealing; can feel very hard and cold.
- Best For: Mid-century modern or contemporary homes, and those looking for a highly durable, unique, and low-maintenance (after sealing) statement floor.
Quarry Tile: The Utilitarian Workhorse
Made from unglazed, natural clay, quarry tiles are the definition of function. They are extruded, giving them a uniform, often reddish or tan, color.
- Pros: Extremely durable, dense, and non-slip; very affordable; often used in commercial kitchens for its utility.
- Cons: Limited color and style options (typically earthy reds and browns); porous and requires sealing; can feel industrial.
- Best For: A truly utilitarian kitchen, a mudroom/kitchen combo, or a rustic cabin where pure function trumps fashion.
The Style Spectrum: Colors, Patterns, Sizes, and Finishes
Selecting the material is only half the battle. The style choices you make will define the entire visual weight and feel of your kitchen.
Color Psychology for Your Kitchen Floor
Your floor color sets the stage.
- Light Colors (White, Beige, Light Gray): Make a space feel larger, brighter, and airier. They are excellent for small kitchens or those with limited natural light. The downside? They will show every crumb, dust bunny, and spill. A light-colored kitchen floor tile demands more frequent cleaning.
- Dark Colors (Charcoal, Black, Navy): Create a sense of intimacy, drama, and sophistication. They are excellent at hiding dirt and dust, making them surprisingly low-maintenance from a daily cleaning perspective. However, they can show water spots, lint, and pet hair more easily, and can make a small kitchen feel cavernous if not balanced with ample light and reflective surfaces.
- Mid-Tones (Greige, Taupe, Warm Gray): Often the perfect compromise. They hide dirt reasonably well, don’t dominate the space, and provide a neutral, welcoming backdrop that allows your cabinetry and countertops to take center stage.
- Bold Colors & Patterns: A kitchen floor tile with a vibrant color or complex pattern becomes the star of the show. This is a powerful design move that infuses personality and energy. When going bold, it’s often wise to keep the cabinets, walls, and countertops more subdued to avoid visual chaos.
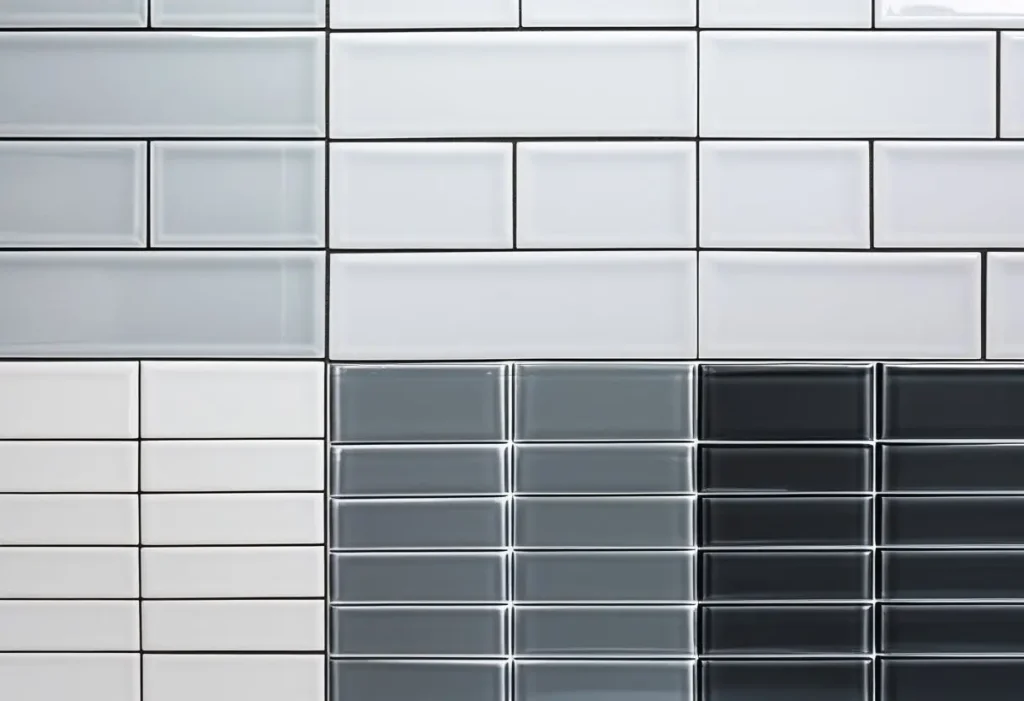
The Magic of Grout: A Design Powerhouse
Grout is not just filler; it’s an integral part of the design.
- Color Choice:
- Matching Grout: Creates a seamless, uniform field where the tile pattern is the focus. It minimizes the visual grid.
- Contrasting Grout: Highlights the shape and pattern of each individual tile. It can turn a simple subway tile layout into a graphic statement. For a busy kitchen, a medium-toned grout (like a gray or taupe) is the most practical for hiding stains.
- Grout Type: Use a high-quality, sanded grout for floors (for joints 1/8″ or wider) as it is more durable. For stain resistance, consider an epoxy or urethane grout. These are more expensive and tricky to work with but are virtually stain-proof and don’t require sealing, making them an excellent long-term investment for a kitchen floor tile.
Tile Size and Layout: How to Manipulate Space
- Large Format Tiles (24″x24″ and larger): Create a modern, streamlined look with fewer grout lines. This makes the space feel larger and is easier to clean. They require a perfectly flat subfloor and a skilled installer.
- Small Tiles (Mosaics, Hexagons, Penny Rounds): Add texture, pattern, and a traditional feel. More grout lines can provide better slip resistance but are more challenging to keep clean.
- Plank Tiles (6″x24″ or 6″x36″): Ideal for creating a wood-look floor. Laying them in a staggered “running bond” (like brick) or a herringbone pattern adds visual interest and can make a narrow room feel wider.
- Layout Patterns: Don’t just default to a standard grid. Consider a diagonal layout to add dynamism, or a Versailles pattern for a classic European feel with large format tiles.
Surface Finishes: From Matte to High-Gloss
- Polished/Glossy: Reflects light, making the space feel brighter and more open. However, it is the most slippery when wet and shows every single scratch, water spot, and footprint.
- Matte/Honed: The most practical choice for a kitchen floor tile. It provides excellent slip resistance, hides scratches and smudges beautifully, and offers a modern, understated elegance.
- Textured (e.g., Slate-look, Wood-look): Offers the highest degree of slip resistance. It can mimic natural materials perfectly but may require a bit more effort to clean as dirt can get trapped in the grooves.
The Trend Report: What’s Hot in Kitchen Floors
- Large Format Porcelain Slabs: Minimizing grout lines to the extreme for a seamless, almost monolithic look.
- Realistic Wood-Look Porcelain: Technology has advanced to where the grain, texture, and color variation are incredibly authentic, offering the warmth of wood with the durability of tile.
- Terrazzo Tiles: Bringing a playful, retro-modern vibe with its signature speckled pattern.
- Graphic Cement Tiles: Used as a statement area, often in a kitchen island footprint or entryway.
- Natural Stone Looks in Cool Tones: Gray and charcoal-based marbles and slates continue to be popular for their modern, sophisticated feel.
- Herringbone and Chevron Patterns: Using wood-look or rectangular tiles to create classic, dynamic patterns that draw the eye.
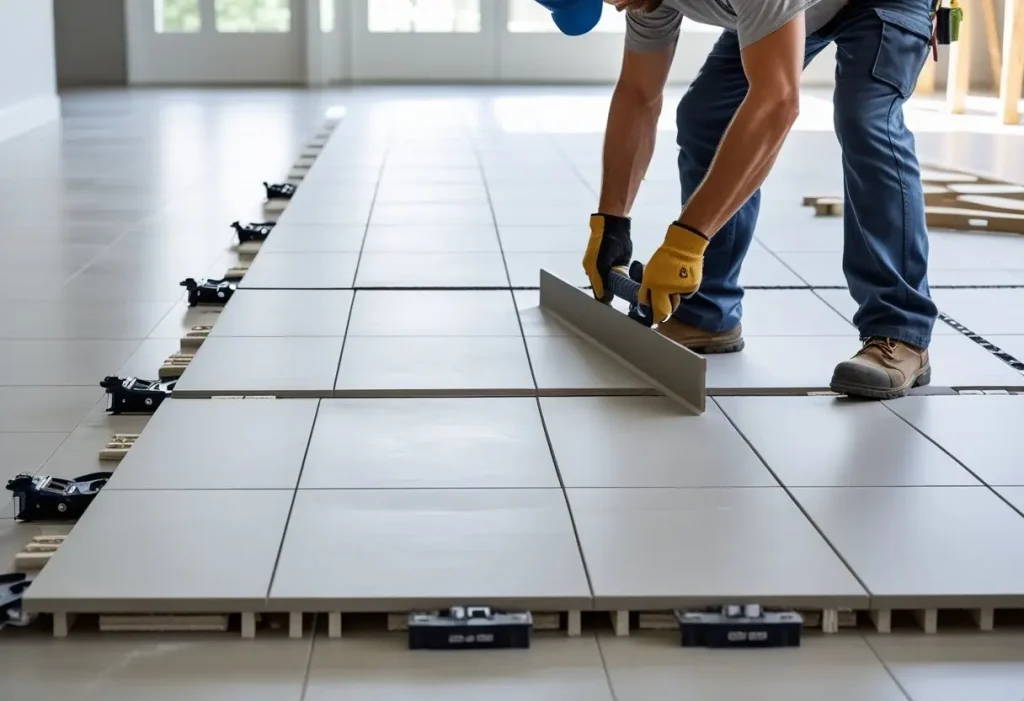
The Professional Installation Deep Dive
A perfect tile can be ruined by a poor installation. This is where the rubber meets the road. Understanding the process ensures you can vet your contractor and know what to expect.
Subfloor Preparation: The Unseen Hero
This is the single most important step. A tile installation is only as good as the surface it’s stuck to. The subfloor must be:
- Structurally Sound: No significant flex or bounce. A common standard is a deflection of no more than L/360. Your contractor can assess this.
- Clean, Level, and Flat: Any debris, old adhesive, or protruding nails must be removed. The floor must be perfectly flat within 1/8″ over a 10-foot span. Any deviation can lead to “lippage” (where one tile edge is higher than its neighbor) or cracked tiles.
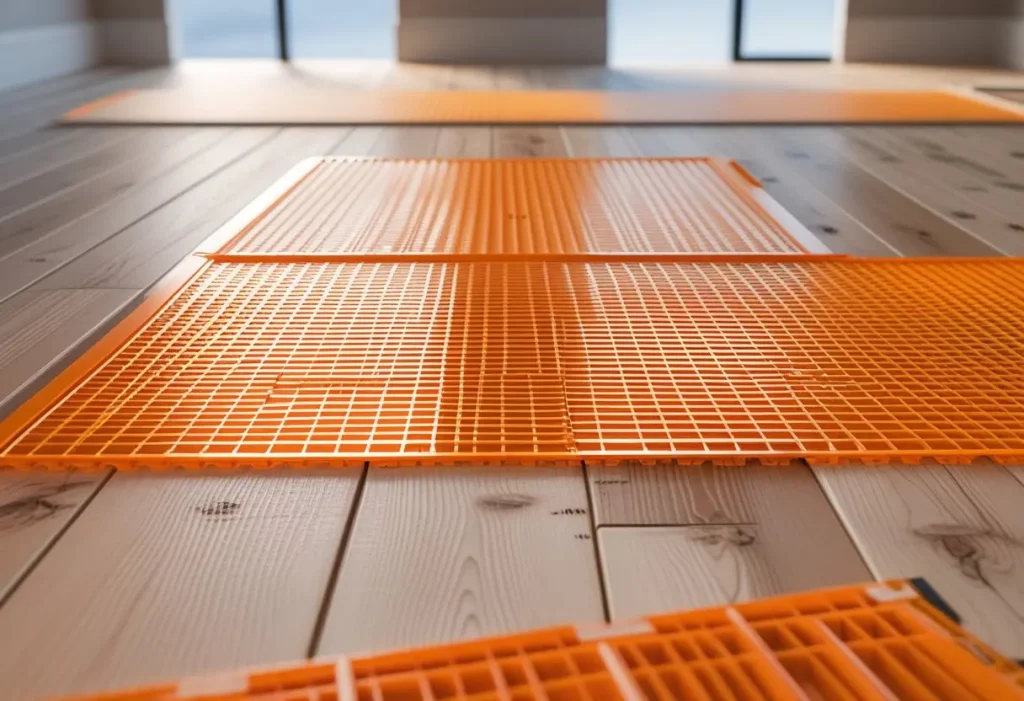
- The Right Material: Over wood subfloors, an underlayment like cement backer board or a decoupling membrane (like Schluter-DITRA) is absolutely mandatory. This prevents cracks from the natural movement of the wood substrate from telegraphing up through the tiles. Over a concrete slab, it must be checked for moisture.
Waterproofing: Your Kitchen’s Insurance Policy
While a porcelain tile itself is waterproof, the water can seep through the grout lines and damage the subfloor below. In a kitchen, a full waterproofing system is a wise investment, especially around dishwashers, sinks, and refrigerators with ice makers. Products like Schluter Systems offer integrated waterproofing membranes that provide a failsafe against leaks. For more on protecting your entire kitchen from water damage, consider reading our guide on [water-resistant kitchen design principles on Cozynestdecor.pro].
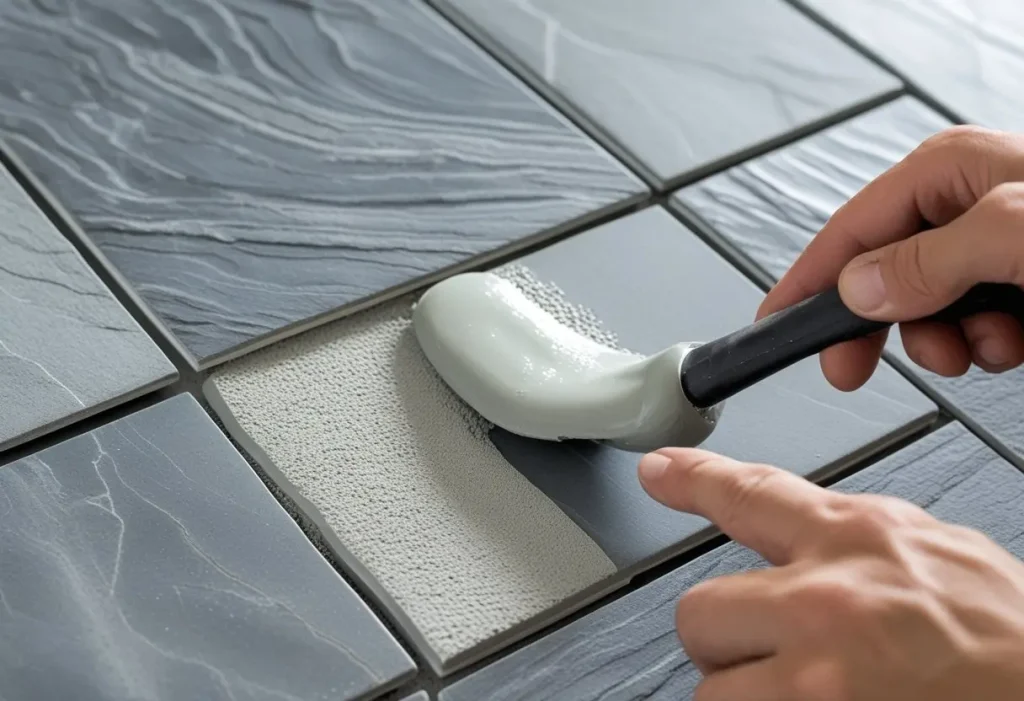
Mortar and Adhesives: Choosing the Right Glue
Not all mortars are created equal. Using the wrong type is a recipe for failure.
- Thinset Mortar: This is the standard. For large format tiles, a medium-bed thinset is used to accommodate the thicker layer needed to maintain level.
- Modified vs. Unmodified: Modified thinset has polymers added for better adhesion and flexibility. It is typically required for most installations, especially over backer board.
- The Notch Trowel Matters: The size and shape of the trowel’s notches determine how much mortar is applied. A larger tile requires a larger notch (e.g., 1/2″ x 1/2″ square notch). The installer should also “back-butter” large tiles—applying a skim coat of mortar to the back of the tile—to ensure 100% coverage.
Layout and Cutting: The Art of Precision
A professional will start by finding the center of the room and dry-laying tiles to ensure the layout is balanced, avoiding skinny, awkward cuts along the walls. Precise cutting, especially for complex patterns or around obstacles, requires a high-quality wet saw. Nippers and grinders are used for smaller, intricate cuts.
Grouting for a Flawless Finish
Once the mortar has cured, grouting begins. The mortar is mixed to a consistent, paste-like texture and forced into the joints with a rubber float. The key is to remove all excess grout from the tile surface before it hazes over. After it has initially set, the tile is cleaned with a damp sponge. Using a grout release on natural stone before grouting is crucial to prevent staining.
Sealing and Protecting Your Investment
- Grout Sealing: For cement-based grouts, applying a penetrating sealer is critical. It doesn’t make the grout waterproof but makes it highly stain-resistant. This should be done 48-72 hours after grouting.
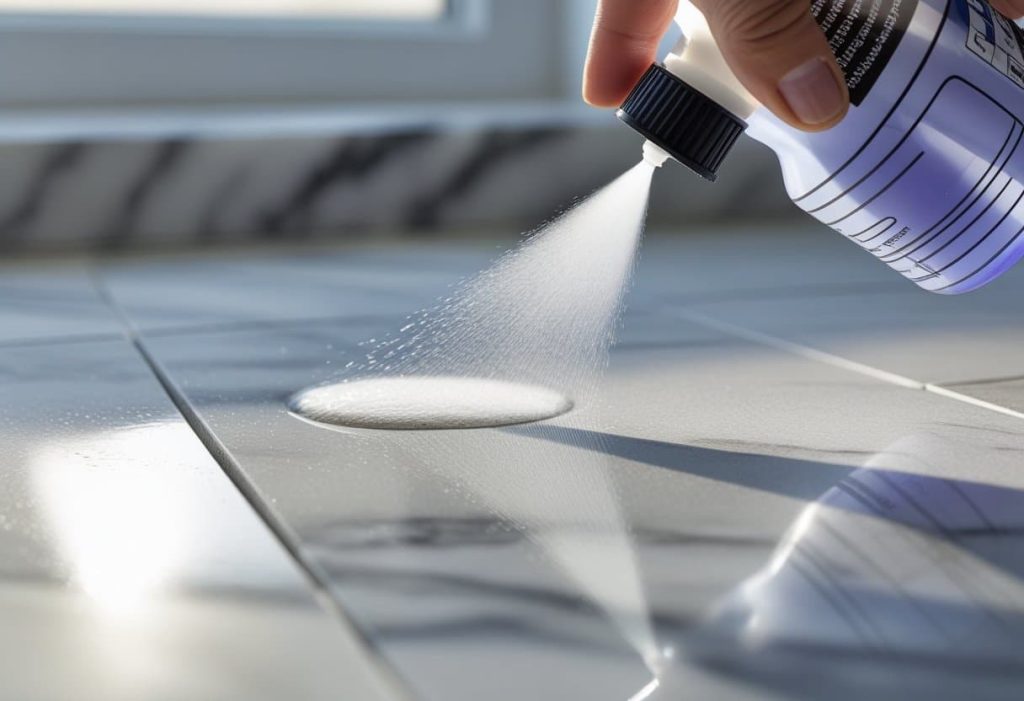
- Stone Sealing: All natural stone must be sealed with an impregnating sealer designed for that specific type of stone. This is a non-negotiable step.
Living With Your Choice: Maintenance and Care
Proper care will keep your floor looking beautiful for decades.
- Daily: Sweep or vacuum (with a hard floor setting) to remove abrasive grit and dirt.
- Weekly: Damp mop with a pH-neutral cleaner specifically designed for tile and stone. Avoid vinegar, lemon juice, or abrasive cleaners, which can etch stone and degrade grout.
- Spills: Wipe up immediately. While porcelain is stain-proof, the grout is not.
- Grout Maintenance: For stained grout, use a dedicated grout cleaner. For a refresh, grout paint or pens can be used, but for a long-term solution, damaged grout can be carefully removed and re-grouted.
- Re-sealing: For natural stone and sealed grout, test for absorption every year. Sprinkle a few drops of water. If it darkens or absorbs within 10 minutes, it’s time to re-seal.
Cost Analysis: Budgeting for Your Kitchen Floor Tile Project
Costs vary wildly based on material, labor, and location, but here’s a rough guide (per square foot, installed):
- Ceramic Tile: $5 – $15
- Porcelain Tile: $7 – $20
- Natural Stone Tile: $15 – $30+
- Cement Tiles: $20 – $40+
- Terrazzo Tiles: $15 – $30
Remember to budget for:
- Demolition and Disposal: Of your old flooring.
- Subfloor Preparation: Leveling compound, backer board, etc.
- Underlayment/Membranes: Decoupling or waterproofing.
- Installation Materials: Mortar, grout, sealer.
- Trim and Transitions: Schluter metal edges or wood moldings.
DIY vs. Hiring a Pro: A Frank Assessment
- DIY: Can save you 50% or more on labor costs. It’s feasible if you are highly skilled, patient, and the project is small and simple (e.g., a square kitchen with a basic ceramic tile). The risks are high: improper installation can lead to cracked tiles, hollow spots, lippage, and ultimately, a costly tear-out and re-do.

- Hiring a Pro: The significant cost is justified by expertise, speed, and warranty. A professional brings the right tools, knows how to handle subfloor issues, and can execute complex layouts flawlessly. For large format tiles, natural stone, or any complex pattern, hiring a professional is not just recommended; it’s essential.
Conclusion: Stepping Forward with Confidence
Choosing your kitchen floor tile is a journey that weaves together hard data and personal taste. It requires you to be honest about your lifestyle, your budget, and your design aspirations. You are now armed with the knowledge to move beyond the showroom’s allure and ask the critical questions: What is the PEI rating? What is the water absorption? Is my subfloor ready? What does the long-term maintenance truly entail?
The perfect kitchen floor tile for you is the one that meets your practical needs while making your heart sing every time you walk into the room. It’s a foundation that supports your life and reflects your style. Take your time, gather samples, and see how they look in your own kitchen’s light. Consult with a reputable professional. Make an informed choice, and you will invest in a floor that serves you beautifully for many years to come.
Frequently Asked Questions (FAQs)
What is the most durable type of kitchen floor tile?
Porcelain tile is widely considered the most durable option for a kitchen floor. Its high density, achieved through intense heat and pressure, makes it highly resistant to scratches, chips, stains, and moisture. When selecting a porcelain kitchen floor tile, look for a PEI rating of IV to ensure it can handle heavy foot traffic.
What is the easiest kitchen floor tile to maintain?
Unglazed porcelain tile with a matte finish and a dark or medium-toned epoxy grout is the easiest to maintain. The porcelain itself is stain-proof and easy to clean, while the epoxy grout is non-porous and resists stains and mildew, requiring only simple mopping without the need for harsh chemicals or frequent sealing.
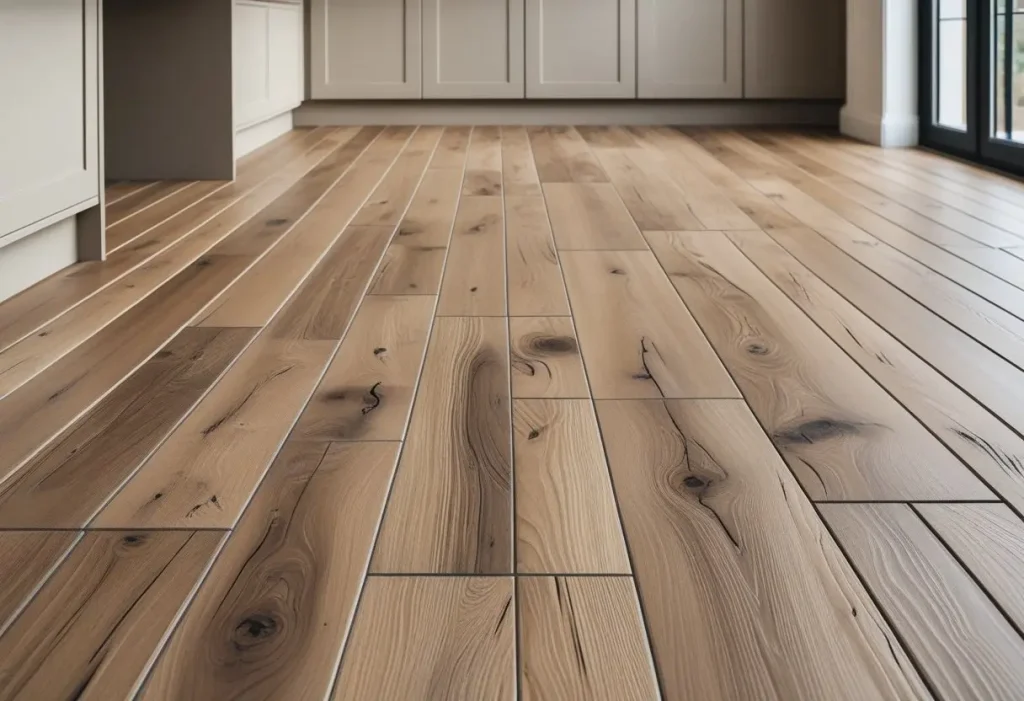
Can you use wood-look tile for a kitchen floor?
Absolutely. Wood-look porcelain plank tile is an excellent choice for a kitchen floor tile. It provides the warm, timeless aesthetic of hardwood but with superior durability, water resistance, and ease of maintenance. It’s an ideal solution for kitchens where you want the look of wood without worrying about spills, scratches, or moisture damage.
How do I choose the right size tile for my kitchen?
The size of your kitchen floor tile should relate to the room’s dimensions. Large-format tiles (24×24 inches or larger) are ideal for big, open kitchens as they create a seamless, modern look with fewer grout lines. For smaller kitchens, medium-sized tiles (12×12 or 12×24) can help avoid a cluttered look. Plank tiles (6×36) can be laid lengthwise to make a narrow kitchen appear wider.
Is kitchen floor tile going out of style?
No, tile is a classic and permanent flooring choice that does not go out of style. While specific colors and finishes may trend, the material itself remains a top contender due to its practicality and versatility. Current trends like realistic wood-look porcelain, large-format slabs, and graphic cement tiles ensure that kitchen floor tile continues to evolve and remain a fresh, modern option.
What is the best color for a kitchen floor tile?
The best color is subjective and depends on your desired aesthetic and practical needs. Light colors (white, beige) make small kitchens feel larger but show more dirt. Dark colors (charcoal, black) are dramatic and hide dirt well but can show water spots. Mid-tone greige or gray is often the most practical and popular choice, offering a modern look that effectively camouflages everyday dust and debris.