Have you ever stood in a room, staring at a blank wall, and felt a profound sense of emptiness? That empty space is more than just a lack of color or furniture; it’s a missed opportunity—a canvas waiting for a story. In our fast-paced world, our homes have become our sanctuaries, and every corner should resonate with our personality, our memories, and our unique sense of style.
Yet, filling these spaces with beautiful art can feel daunting, especially when gallery-quality pieces come with gallery-level price tags. But what if you could create breathtaking, conversation-starting art yourself? What if you could turn your walls into a curated gallery of your own making, without needing a degree in fine arts or an unlimited budget?
This is the magic and empowerment of DIY Wall Art. It’s not just about decorating; it’s about creating. It’s about the joy of turning a simple afternoon into a creative journey, of transforming humble materials into heirlooms, and of infusing your living space with pieces that are intrinsically you. Whether you’re a seasoned crafter or someone who hasn’t picked up a paintbrush since grade school, the world of do-it-yourself home decor is vast, welcoming, and incredibly rewarding.
In this ultimate guide, we will journey through everything you need to know to become the artist of your own home. From the simplest projects for absolute beginners to advanced, trend-setting designs, we’ll explore how DIY Wall Art can revolutionize your space, making it cozier, more personal, and undeniably beautiful. Let’s dive in and unlock the creative potential hiding within your four walls.
What is DIY Wall Art?
At its core, DIY Wall Art is any piece of visual decoration made for your walls that you create yourself. It moves beyond the mass-produced prints and generic store-bought canvases to offer something truly unique. It’s the tangible result of your creativity, a physical manifestation of your personal aesthetic that adds soul and character to a room.
Unlike traditional art, which is often about the artist’s vision, DIY Wall Art is fundamentally about your vision. It can be as simple as framing a collection of pressed leaves from your garden, as bold as a large-scale abstract painting, or as intricate as a woven macramé wall hanging. The “Do-It-Yourself” aspect is what sets it apart. It encompasses a wide range of activities:
- Painting and Drawing: Using acrylics, watercolors, oils, or inks on canvas, wood, or paper.
- Textile and Fiber Arts: Creating pieces with yarn, fabric, thread, or rope, such as tapestries, macramé, or embroidery hoops.
- Paper Crafts: Utilizing techniques like origami, quilling, decoupage, or creating paper flowers and garlands.
- Mixed Media: Combining various materials like wood, metal, photographs, found objects, and natural elements into a cohesive piece.
- Digital Creations: Designing your own prints using graphic design tools and having them professionally printed.
The beauty of DIY Wall Art lies in its accessibility. It democratizes home decor, proving that you don’t need a massive budget or professional skills to have a beautiful home. You just need a spark of inspiration, a willingness to experiment, and the guidance we’re about to provide.
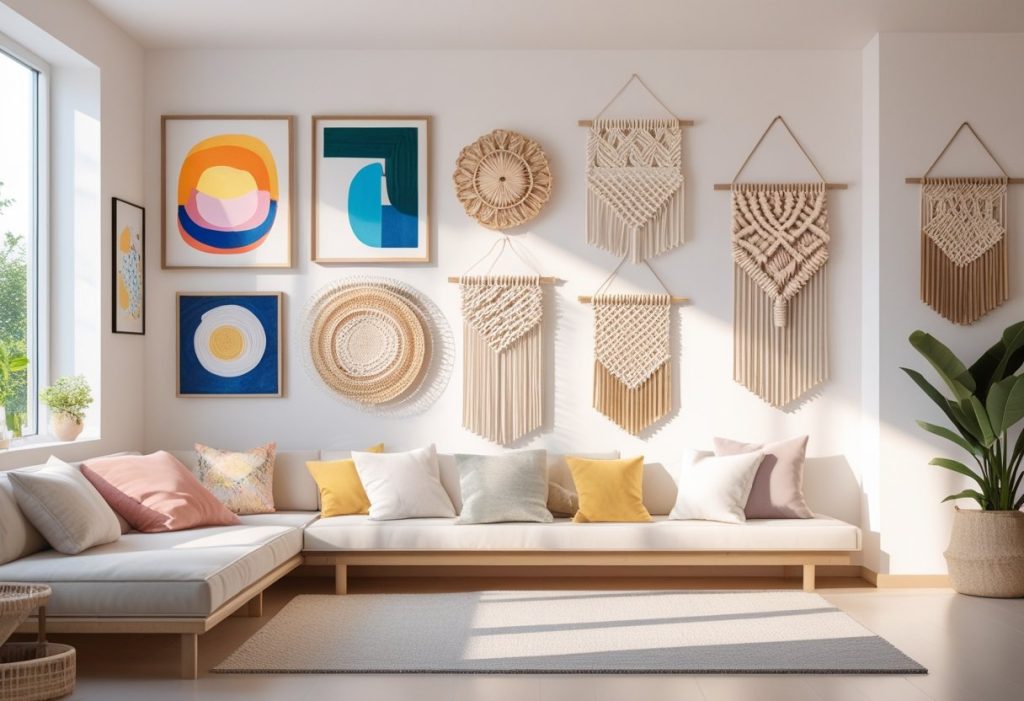
https://cozynestdecor.pro/images/diy-wall-art-modern-living-room.jpg
Handmade DIY wall art enhances your home’s beauty, adding a personal touch that store-bought pieces simply can’t match.
Why DIY Wall Art is the Perfect Home Decor Idea
In an age of digital saturation and mass production, the appeal of handmade items has skyrocketed. But why exactly has DIY Wall Art become such a cornerstone of modern interior design? The reasons are as much emotional as they are aesthetic.
Unmatched Personalization and Self-Expression
Your home should tell your story. With DIY Wall Art, you are the author. You choose the colors, the textures, the themes, and the size. You can create a piece that commemorates a special vacation, incorporates your favorite color palette, or simply reflects a mood you love. This level of customization is impossible to find in ready-made decor, making your space authentically and uniquely yours.
Significant Cost-Effectiveness
Let’s talk numbers. A large, statement piece of art from a home decor store can easily cost hundreds, if not thousands, of dollars. Conversely, a stunning DIY Wall Art project can often be completed for under $50, and sometimes for just a few dollars if you use repurposed materials. This affordability allows you to create multiple pieces, change them with the seasons, or create a massive gallery wall without breaking the bank. It’s the ultimate form of affordable wall art.
The Immense Satisfaction of Creation
There is a profound sense of accomplishment that comes from creating something with your own hands. The process of making DIY Wall Art can be a form of meditation and stress relief. And the final reward—stepping back to admire a beautiful piece that you made—provides a boost of confidence and pride that lasts every time you walk into the room.
Eco-Friendly and Sustainable Choice
The “make” culture is inherently more sustainable than the “buy” culture. DIY Wall Art allows you to upcycle and repurpose items that might otherwise end up in a landfill. An old window frame becomes a shabby-chic message board, discarded wine corks transform into a unique mosaic, and scrap fabric can be woven into a boho-chic wall hanging. By choosing DIY, you’re not only decorating your home but also making a conscious choice for the planet.
The Perfect Fit, Every Time
We’ve all been there: you find a print you love, but it’s an awkward size for your wall. With DIY Wall Art, you work with your space. You can create a triptych to span a wide sofa, a tall, narrow piece for a tight hallway, or a collection of small works to fill an odd nook. You have complete control over the scale and proportions, ensuring a perfect fit for any challenging space.
Tools and Materials You’ll Need for Your DIY Wall Art Journey
Before we jump into the projects, let’s set up your creative arsenal. The good news is that you likely already have many of these items, and the rest are inexpensive and easy to find. You don’t need a professional artist’s studio; a kitchen table and a bit of enthusiasm are enough.

The Essential Toolkit
- Surfaces: Canvases (stretched or panels), wood panels or plaques, high-quality paper (watercolor, cardstock), or even repurposed items like old cabinet doors or salvaged wood.
- Adhesives: A strong, all-purpose glue like E6000 or Gorilla Glue, a hot glue gun with sticks for quick bonds, and Mod Podge for decoupage and sealing.
- Brushes and Applicators: A variety of paintbrush sizes (small for details, large for washes), foam brushes for smooth, streak-free application, and palette knives for textured painting.
- Cutting Tools: A sharp pair of craft scissors, a precision craft knife (like an X-Acto), a self-healing cutting mat, and a metal ruler.
- Measuring and Marking: A tape measure, a level (crucial for hanging!), a pencil, and painter’s tape for creating clean lines and geometric patterns.
- Protection: Drop cloths or old newspapers to protect your workspace, and disposable gloves to keep your hands clean.
Core Creative Materials
- Paints: Acrylic paints are the MVP of DIY Wall Art. They are versatile, water-soluble, fast-drying, and come in a vast array of colors. Consider also watercolors for soft, ethereal effects or spray paint for smooth, even coverage on various materials.
- Textiles: Yarn for macramé or pompoms, fabric scraps for quilting or bunting, and embroidery floss for detailed thread paintings.
- Natural and Found Objects: Driftwood, pressed flowers and leaves, seashells, interesting stones, and dried citrus slices.
- Paper: Scrapbook paper, old book pages, maps, sheet music, and origami paper for countless paper-based wall crafts.
- Frames and Mounting: A collection of thrifted frames (you can paint them to match), floating shelves to display smaller objects, and command strips for damage-free hanging.
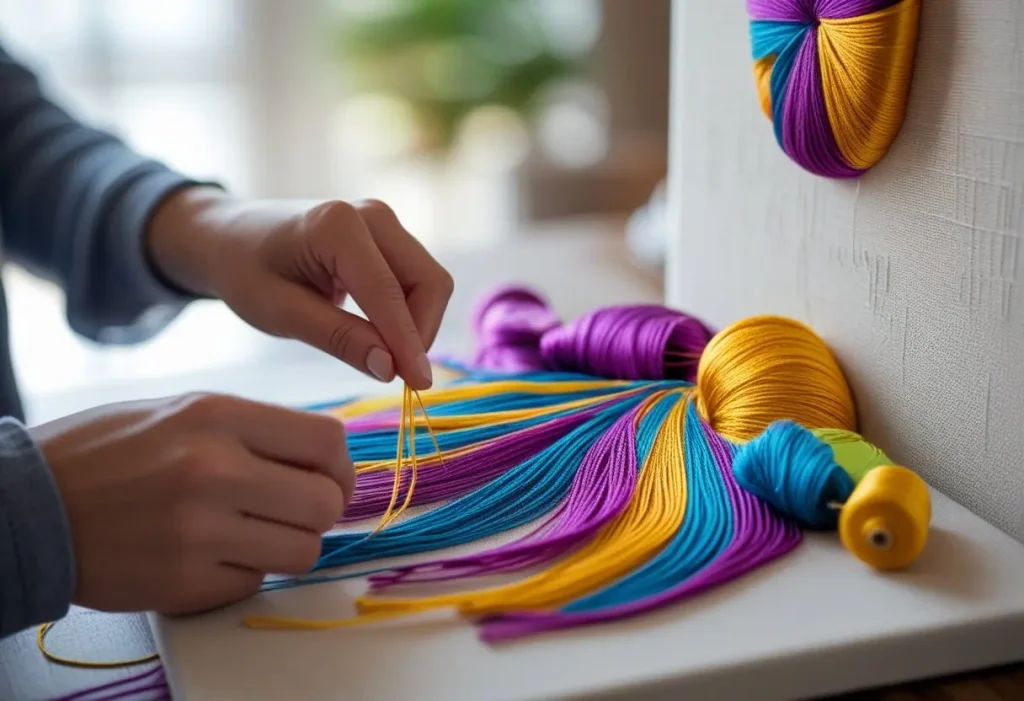
https://cozynestdecor.pro/images/diy-wall-art-materials-tools.jpg
Gather your materials—from canvases and paints to brushes and glue—to begin your creative DIY wall art project with confidence.
Having these tools on hand will prepare you for almost any project we explore next. Remember, half the fun is in experimenting, so don’t be afraid to mix and match materials!
Step-by-Step DIY Wall Art Ideas for Every Room
Now for the main event! Here is a curated collection of DIY Wall Art projects, ranging from beginner-friendly to more advanced. Each is designed to help you create stunning handmade wall decorations with clear, easy-to-follow instructions.
Project 1: The Effortless Abstract Acrylic Pour
- Skill Level: Beginner
- Room: Living Room, Bedroom
- Style: Modern, Fluid
Abstract pour painting is a fantastic way to create professional-looking DIY Wall Art with minimal technical skill. The technique relies on the unpredictable flow of paint, creating unique, marble-like patterns.
What You’ll Need:
- A stretched canvas (any size)
- 3-4 colors of acrylic paint
- Pouring medium (available at craft stores)
- Disposable cups
- A large box or tray to contain the mess
Instructions:
- Prepare your workspace by placing the canvas inside the box.
- In separate cups, mix each color of acrylic paint with the pouring medium. Aim for a consistency similar to warm honey.
- You can use several techniques. For a “dirty pour,” layer all the different colors into one cup without stirring them together.
- Carefully place the canvas face-down over the top of the cup. In one fluid motion, flip the entire assembly over so the cup is sitting on the canvas.
- Gently lift the cup. The paint will flow out and across the canvas.
- Tilt the canvas in all directions, guiding the paint to cover the entire surface and the edges.
- Let it dry completely for 24-48 hours on a level, protected surface. The result is a stunning, one-of-a-kind masterpiece.
Project 2: Botanical Pressed Flower Shadow Box
- Skill Level: Beginner
- Room: Bedroom, Bathroom, Hallway
- Style: Romantic, Vintage, Nature-Inspired
Preserve the beauty of nature with this delicate and timeless piece of DIY Wall Art. It’s a wonderful way to memorialize flowers from a special occasion, like a wedding bouquet or your garden’s first blooms.
What You’ll Need:
- A deep, glass-fronted shadow box frame
- Pressed flowers and leaves (press them in a heavy book for 2-3 weeks)
- Acid-free paper or fabric for the background
- Tweezers
- Acid-free glue or a glue dot roller
Instructions:
- Open your shadow box and place your chosen background material inside.
- Using the tweezers, carefully arrange your pressed botanicals on the background. Play with the composition before you glue anything down. Consider creating a symmetrical wreath or an organic, cascading layout.
- Once you’re happy with the design, use the tweezers to lift each piece and apply a tiny dot of glue to the back before placing it back in position.
- Allow the glue to dry completely before carefully placing the glass back on and securing the frame.
- Hang it out of direct sunlight to prevent the flowers from fading.
Project 3: Modern Macramé Wall Hanging
- Skill Level: Intermediate
- Room: Living Room, Bedroom, Home Office
- Style: Boho, Scandinavian, Modern
Textile art adds warmth and texture to any space. Macramé, the art of knotting cord, is enjoying a major resurgence and is easier to learn than it looks.
What You’ll Need:
- A wooden dowel or driftwood branch
- Several lengths of macramé cord (3mm or 5mm cotton cord works well)
- Scissors
- A tape measure
Instructions:
- Cut your cords to your desired length (remember, they will be roughly halved when knotted). A good starting length is 4-5 times the desired final length.
- Attach the cords to the dowel using Lark’s Head Knots. Fold a cord in half, place the loop over the dowel, and pull the ends through the loop. Repeat across the dowel.
- The simplest pattern involves sections of Square Knots. Divide your cords into groups of four. To make a square knot, take the left cord over the two middle cords and under the right cord. Then, take the right cord under the two middle cords and up through the loop on the left. Pull tight.
- Create a pattern by making rows of square knots, leaving some space, and then starting another section. You can add beads or dye sections of the cord for extra interest.
- Finish the bottom with a simple fringe or by tying all the cords together in an overhand knot.
Project 4: Geometric Wood Slat Art
- Skill Level: Intermediate
- Room: Living Room, Above the Bed, Dining Room
- Style: Mid-Century Modern, Industrial, Graphic
This project makes a huge visual impact with a surprisingly simple construction. It’s perfect for creating a large-scale focal point.
What You’ll Need:
- Several thin wood slats (like 1″x2″ furring strips)
- A saw (or have the store cut them for you)
- Wood glue
- A strong wood adhesive or small nails and a hammer
- A backing board (optional, for stability)
- Paint or wood stain in 2-3 colors
Instructions:
- Plan your design. Simple triangles, chevrons, or asymmetrical patterns work well. Sketch it out and determine the lengths you need for each slat.
- Cut your wood slats to the required lengths.
- Stain or paint your slats in your chosen colors. Let them dry completely.
- Lay out your design on a flat surface. If using a backing board, arrange the slats on top of it.
- Carefully glue (and nail, if desired) each slat in place, ensuring they are straight and aligned. If not using a backing board, you can glue the slats directly to each other at the edges.
- Once the adhesive is fully cured, attach a picture-hanging kit to the back.
Easy DIY Wall Art for Beginners
If you’re new to the world of DIY home decor, start here. These projects require minimal supplies, no prior experience, and deliver maximum satisfaction.
Washi Tape Geometric Wall Pattern
Washi tape is a decorator’s best friend. It’s colorful, patterned, and, most importantly, removable! You can create an entire accent wall or a small, framed design.
- How-To: Choose 2-3 colors of washi tape. On your wall (or on a large canvas), use a level and a pencil to lightly mark out a simple geometric shape, like a triangle, diamond, or hexagon. Use the tape to outline the shapes, creating a continuous, interlocking pattern. The clean lines look incredibly modern and professional.
Framed Fabric or Scrapbook Paper
This is arguably the easiest way to create affordable wall art.
- How-To: Find a fabric pattern or piece of scrapbook paper that you love. It could be a bold floral, a geometric print, or a vintage map. Purchase an inexpensive frame from a thrift store or craft shop. Cut your fabric or paper to size, place it in the frame, and you’re done! You can create a stunning gallery wall by mixing and matching frames and patterns.
String Art
Create a personalized and whimsical piece with string, nails, and wood.
- How-To: Sand and paint/stain a wood plaque. Print out a simple shape or word (like a heart, star, or your initial) and tape it to the wood. Hammer small nails evenly around the outline of the shape, about 1/4 to 1/2 inch apart. Remove the paper. Then, take embroidery floss or thin yarn, tie it to one nail, and start wrapping it around the nails in a random or patterned way, filling in the shape. Tie it off on another nail.
Budget-Friendly Wall Art Ideas
Decorating your home shouldn’t require a loan. These ideas prove that with a little creativity, you can create stunning DIY Wall Art for just a few dollars.
- Nature’s Gallery: Collect interestingly shaped driftwood, large leaves, or ferns. Spray paint them in matte white, black, or gold and mount them in shadow boxes or simply arrange them on a wall shelf.
- The Paper Plate Masterpiece: Don’t underestimate the humble paper plate! Create a massive, textural mandala by gluing painted or dyed paper plates together in a sunburst pattern. It’s a fantastic, low-cost project for a kid’s room or playroom.
- Comic Book or Book Page Collage: Find old comic books or novels from a thrift store. Tear or cut out your favorite panels or pages and use Mod Podge to collage them onto a canvas or wood panel. Seal it with another layer of Mod Podge for a glossy, unified finish.
- Pompom Wall Hanging: Make dozens of fluffy pompoms using a pompom maker or just your fingers and some yarn. Attach them to a long string at varying heights for a playful, textural piece that’s perfect for a nursery or bedroom.
DIY Wall Art for Living Rooms, Bedrooms & Offices
Different rooms call for different moods and functions. Let’s tailor your creative wall art to its specific space.
For the Living Room: A Statement Gallery Wall
The living room is the heart of the home, a place for gathering and conversation. Your art here should be a reflection of your family’s personality.
- Concept: Don’t just frame prints. Mix and match your DIY Wall Art creations. Include a small abstract canvas, a pressed flower shadow box, a woven textile, a vintage mirror, and even 3D objects like a small wreath or a decorative plate. The key is to create a cohesive look by sticking to a limited color palette (e.g., blacks, whites, and woods) or a consistent frame style.
For the Bedroom: A Serene and Textural Triptych
The bedroom is your sanctuary, a place for rest and relaxation. The art should be calming and personal.
- Concept: Create a set of three complementary canvases (a triptych) to hang above your headboard. This could be three minimalist line drawings, three abstract paintings in soothing blues and greens, or three framed pieces of textured linen fabric. The repetition is calming and the scale makes a significant impact without feeling overwhelming.
For the Home Office: An Inspirational Pegboard Organizer
In a home office, function and form must merge. Your DIY Wall Art can be both beautiful and useful.
- Concept: Take a large pegboard and paint it a color that complements your office decor—a deep navy, a warm terracotta, or a crisp white. Mount it on the wall using spacers to create a gap behind it. Then, use various pegboard hooks and shelves to not only hang tools (scissors, tape, pens) but also to display small, rotating pieces of art, inspirational quotes, or a tiny, hanging plant. It’s a dynamic, ever-changing piece of functional art.
Trending DIY Wall Art Designs in 2025
Stay ahead of the curve by incorporating these upcoming trends into your DIY home decor projects.
- Organic Modernism: A blend of clean lines and natural forms. Think a stark, black line-drawing of a vase on a canvas, paired with an actual, textural dried pampas grass arrangement mounted beside it.
- Maximalist Frames: The frame is no longer just a border; it’s part of the art. Look for projects that use extra-wide, ornately carved frames (found at thrift stores and painted in bold colors) or create your own “frame” with paint directly on the wall around a canvas.
- Textured Murals: Instead of flat paint, walls are being treated with textures like lime wash, Venetian plaster, or even strategically applied joint compound to create subtle, tactile murals. This is an advanced but incredibly rewarding DIY Wall Art technique.
- Digital Nostalgia: Glitch art, pixelated motifs, and designs inspired by early internet aesthetics are making their way onto canvases, often with an ironic, playful twist.
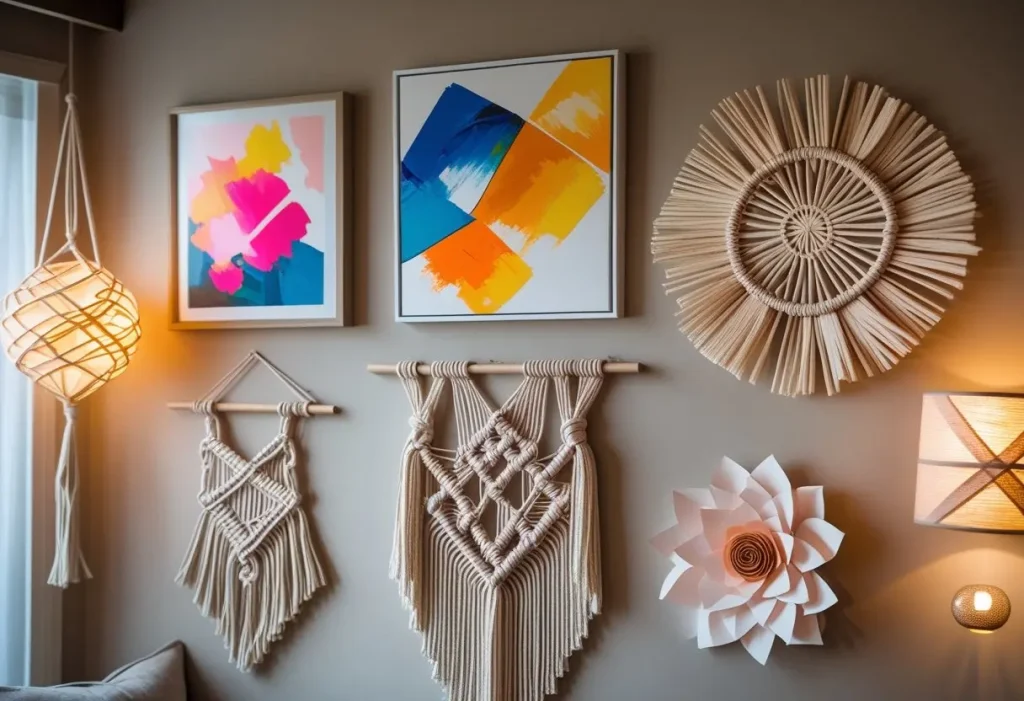
https://cozynestdecor.pro/images/trending-diy-wall-art-2025.jpg
Stay ahead of the curve with 2025’s top trends, including organic modernism, textured murals, and bold, maximalist frames in your DIY wall art.
Eco-Friendly and Sustainable Wall Art Ideas
Embrace a greener lifestyle by creating beautiful art that honors the planet. Eco-friendly DIY Wall Art is not just a trend; it’s a mindset.
- Upcycled Denim Art: Old jeans are full of texture and color. Cut them into shapes and create a denim “quilt” on a canvas, or use the seams and pockets to create a topographic map-like sculpture.
- Recycled Paper Bead Wall Hanging: Roll strips of magazine pages, junk mail, or old gift wrap into tight beads using a thin skewer. Seal them with a non-toxic varnish, then string them together to create colorful, patterned hangings or curtains.
- Mounted Dried Citrus Slices: Slice oranges, lemons, and limes thinly and dry them in a low oven for a few hours. They become translucent and beautiful. Arrange them in a sunburst pattern on a canvas or in a shadow box for a burst of sunny, natural color.
https://cozynestdecor.pro/images/eco-friendly-diy-wall-art.jpg
Make your home decor greener and more personal by creating stunning DIY wall art using recycled, upcycled, and natural materials.
How to Choose the Right Color and Texture
Creating the piece is one thing; ensuring it harmonizes with your room is another. Here’s a quick guide to making smart aesthetic choices for your DIY Wall Art.
- Draw from Your Existing Palette: Look at the dominant colors in your rug, cushions, or a key piece of furniture. Pull one or two of these accent colors into your artwork to create a cohesive look.
- Consider the Mood:
- Calming: Blues, greens, soft greys, and neutrals. Smooth textures.
- Energetic: Reds, oranges, yellows. High-contrast patterns and rough textures.
- Earthy and Grounding: Browns, terracotta, beige, and sage green. Natural textures like wood, jute, and stone.
- Play with Scale and Proportion: A large, bold piece can anchor a room, while a collection of smaller pieces can create a dynamic gallery wall. Ensure your art is proportionate to the wall and the furniture near it—a good rule of thumb is for the art to be about 50-75% the width of the furniture piece below it.
DIY Wall Art Mistakes to Avoid
Even with the best intentions, it’s easy to make a few common missteps. Here’s how to avoid them.
- Skimping on Prep Work: Painting on a dirty surface or not using painter’s tape for clean lines can ruin an otherwise great project. Always prepare your surface properly.
- Hanging Art Too High: The center of your artwork should be at eye level, which is generally around 57-60 inches from the floor. This is a standard gallery practice that makes art feel connected to the space.
- Ignoring the Power of a Gallery Wall: A single, small piece on a large wall can feel lonely and insignificant. Don’t be afraid to group pieces together to create a collective impact.
- Forgetting the Finish: If you’ve created a piece on paper, like a watercolor, always frame it behind glass to protect it from dust, moisture, and UV light.
Where to Display Your Art for Maximum Impact
Placement is everything. It’s the final, crucial step in your DIY Wall Art journey.
- The Focal Point: Above the sofa, the mantel, or the headboard. This is where your largest, most statement-making piece should live.
- Unexpected Nooks: Don’t neglect the small spaces. A narrow piece in a hallway, a small cluster of art in the bathroom, or a single, whimsical piece above a light switch can bring joy to everyday moments.
- Leaning vs. Hanging: For a relaxed, casual vibe, consider leaning a large piece of art on a shelf or mantel instead of hanging it. This works especially well with large canvases and wood slabs.
- Creating Zones: In an open-plan living area, you can use a large piece of art to help define a specific zone, like the dining area or a reading nook.
Final Thoughts: Turn Every Wall Into an Expression of You
Your home is your story. The walls are its pages. DIY Wall Art gives you the pen to write that story yourself, in colors and textures that sing to your soul. It’s a journey of discovery, a practice in mindfulness, and a powerful way to claim your space in a world of mass-produced sameness. From the first stroke of a paintbrush to the final, satisfying tap of the hammer as you hang your creation, you are building more than just decor; you are building a home filled with meaning, memory, and your own unique creative spirit.
So, gather your supplies, clear off a table, and let yourself play. Embrace the happy accidents. Celebrate the imperfections that make your piece one-of-a-kind. You have the vision and the ability to transform any blank wall into the coziest, most inspiring part of your nest.
Frequently Asked Questions (FAQ) About DIY Wall Art
Q1: What are the easiest DIY wall art ideas for beginners?
A: The easiest DIY Wall Art ideas for beginners include using washi tape to create geometric patterns, framing beautiful fabric or scrapbook paper, creating string art with simple shapes, and doing an abstract acrylic pour. These projects require minimal skill and supplies but deliver a high-impact, professional look.
Q2: How can I make DIY wall art on a budget?
A: You can create stunning affordable wall art by using repurposed materials. Frame pages from old calendars or books, create art from collected natural items like driftwood or pressed leaves, use paint samples to create a geometric mosaic, or make pompoms from leftover yarn for a textural wall hanging.
Q3: What materials do I need to start with creative wall decor?
A: To start with basic creative wall decor, you’ll need a few key materials: a surface (like a canvas or wood panel), acrylic paints and brushes, a strong adhesive (like a hot glue gun or E6000), a measuring tape and level, and basic cutting tools. This starter kit will allow you to complete a vast majority of beginner projects.
Q4: How do I choose the right size for my DIY wall art?
A: A good rule of thumb is that your DIY Wall Art should be about 50-75% the width of the furniture it’s hanging above (e.g., your sofa or bed). For a large, blank wall, don’t be afraid to go big or create a gallery wall that collectively fills the space to create a balanced and intentional look.
Q5: Can I create DIY wall art without any painting skills?
A: Absolutely! Many forms of DIY Wall Art require no painting skills at all. You can focus on textile arts like macramé, create collages with paper or fabric, assemble 3D sculptures from found objects, or use techniques like tape-resist to create clean, graphic designs without needing to draw or paint freehand.
Q6: What is the best way to hang heavy DIY wall art?
A: For heavy DIY Wall Art, it’s crucial to use the right hardware. Find a wall stud to screw into directly, or use heavy-duty drywall anchors and screws rated for the weight of your piece. Always use a picture-hanging kit with D-rings on the back of the frame for stability, and when in doubt, consult a hardware store professional.
Q7: How can I make my DIY wall art look more professional?
A: To make your DIY Wall Art look professional, focus on a few key details: always frame works on paper, use a level when hanging to ensure it’s straight, pay attention to color theory and cohesive palettes, and don’t be afraid to make a large-scale statement piece. Finishing edges neatly and signing your work also adds a professional touch.
Q8: What are some good DIY wall art ideas for a modern home?
A: For a modern home, consider DIY Wall Art with clean lines and minimalist aesthetics. This includes large-scale abstract paintings in neutral tones, geometric wood slat art, black and white photography in simple frames, metal wall sculptures, and textile art with simple, repetitive knot patterns.
Q9: How do I protect and preserve my DIY wall art?
A: Protect your DIY Wall Art by spraying paper-based pieces with a UV-protective sealant to prevent fading. For paintings, a clear varnish (matte or gloss) will protect the surface from dust and UV damage. Keep textile art out of direct sunlight and dust it regularly with a hairdryer on a cool, low setting.
Q10: Where can I find inspiration for my next DIY wall art project?
A: Great inspiration for DIY Wall Art can be found on platforms like Pinterest and Instagram. You can also browse home decor magazines like Better Homes & Gardens or websites like Architectural Digest. Often, the best inspiration comes from the world around you—nature, architecture, or even the color of a favorite piece of clothing.
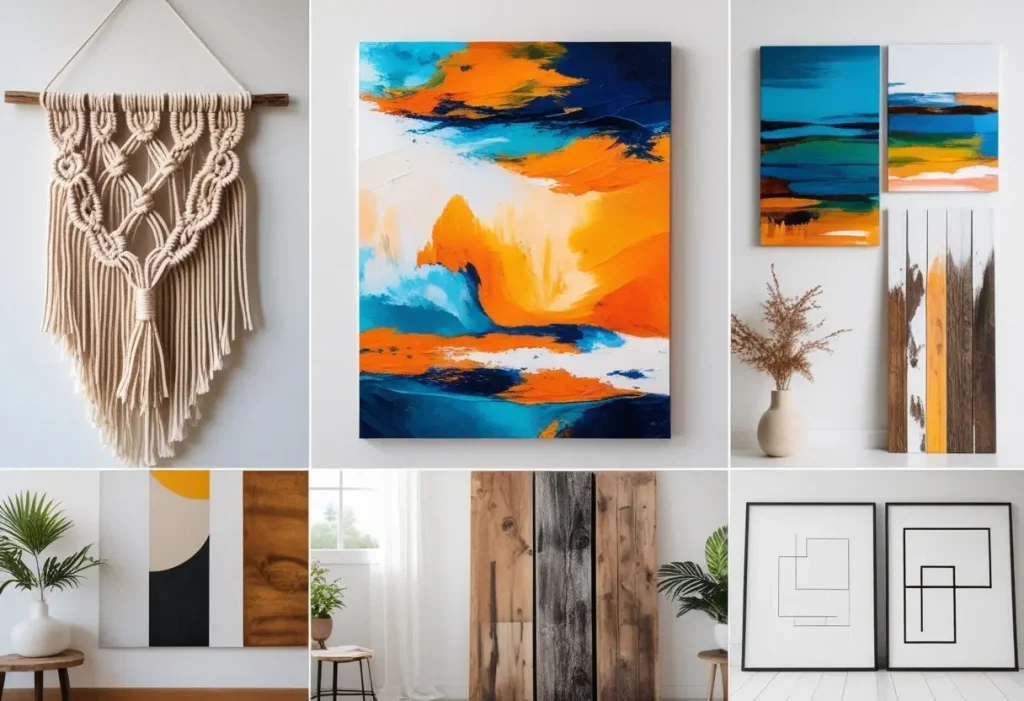
https://cozynestdecor.pro/images/express-yourself-diy-wall-art.jpg
The final, and most rewarding, step: hanging your creation and enjoying the unique personality it brings to your home. Your walls are a canvas for your story.
We hope this ultimate guide has inspired you to pick up a brush, a roll of tape, or a ball of yarn and start creating. The world of DIY Wall Art is waiting for you. For more inspiration, project ideas, and tips to make your home the coziest it can be, explore the rest of our content here at CozyNestDecor.pro. Check out our other guides on Wall Decor and DIY Home Decor for even more creative journeys. Happy creating